6. ANSYS Electronics Desktop使用方法
6.1. Workbench経由の起動
ANSYS Workbenchを起動し、Toolboxビューワー(左ペイン)のMaxwell(2D)、 Maxwell(3D)、HFSSなどをダブルクリックすると、Project Schematicビューワーに電磁界解析の解析システム(テーブル)が表示されます。
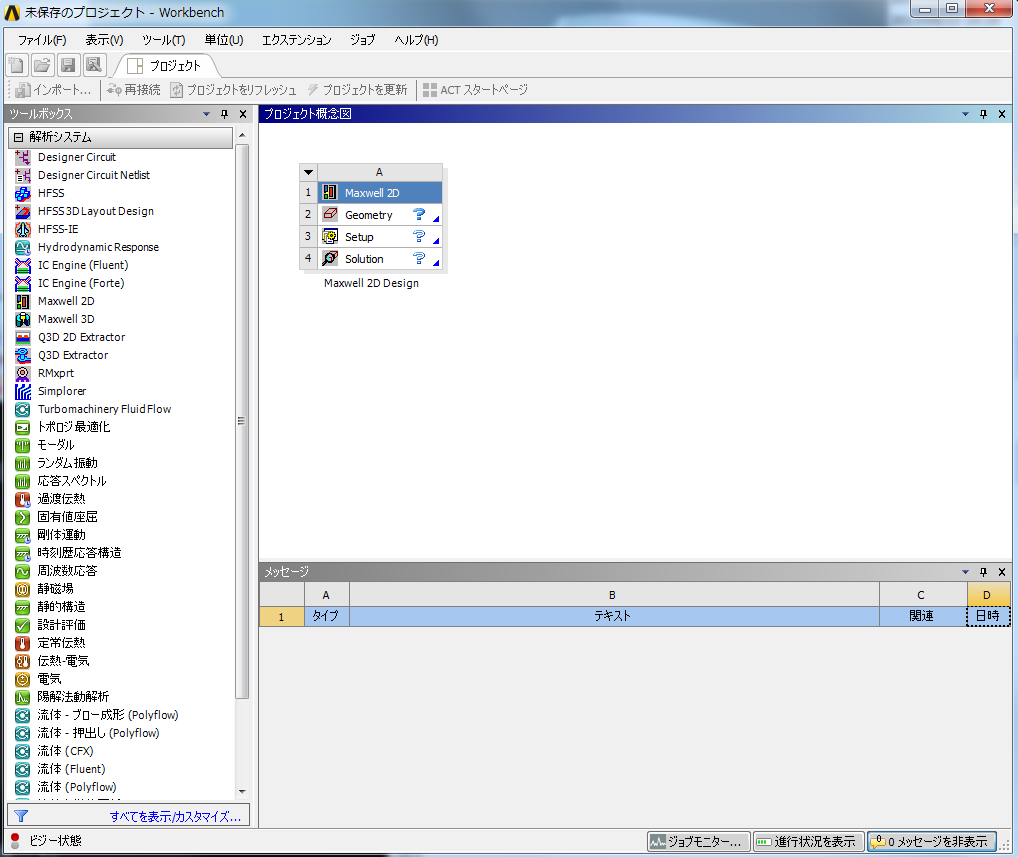
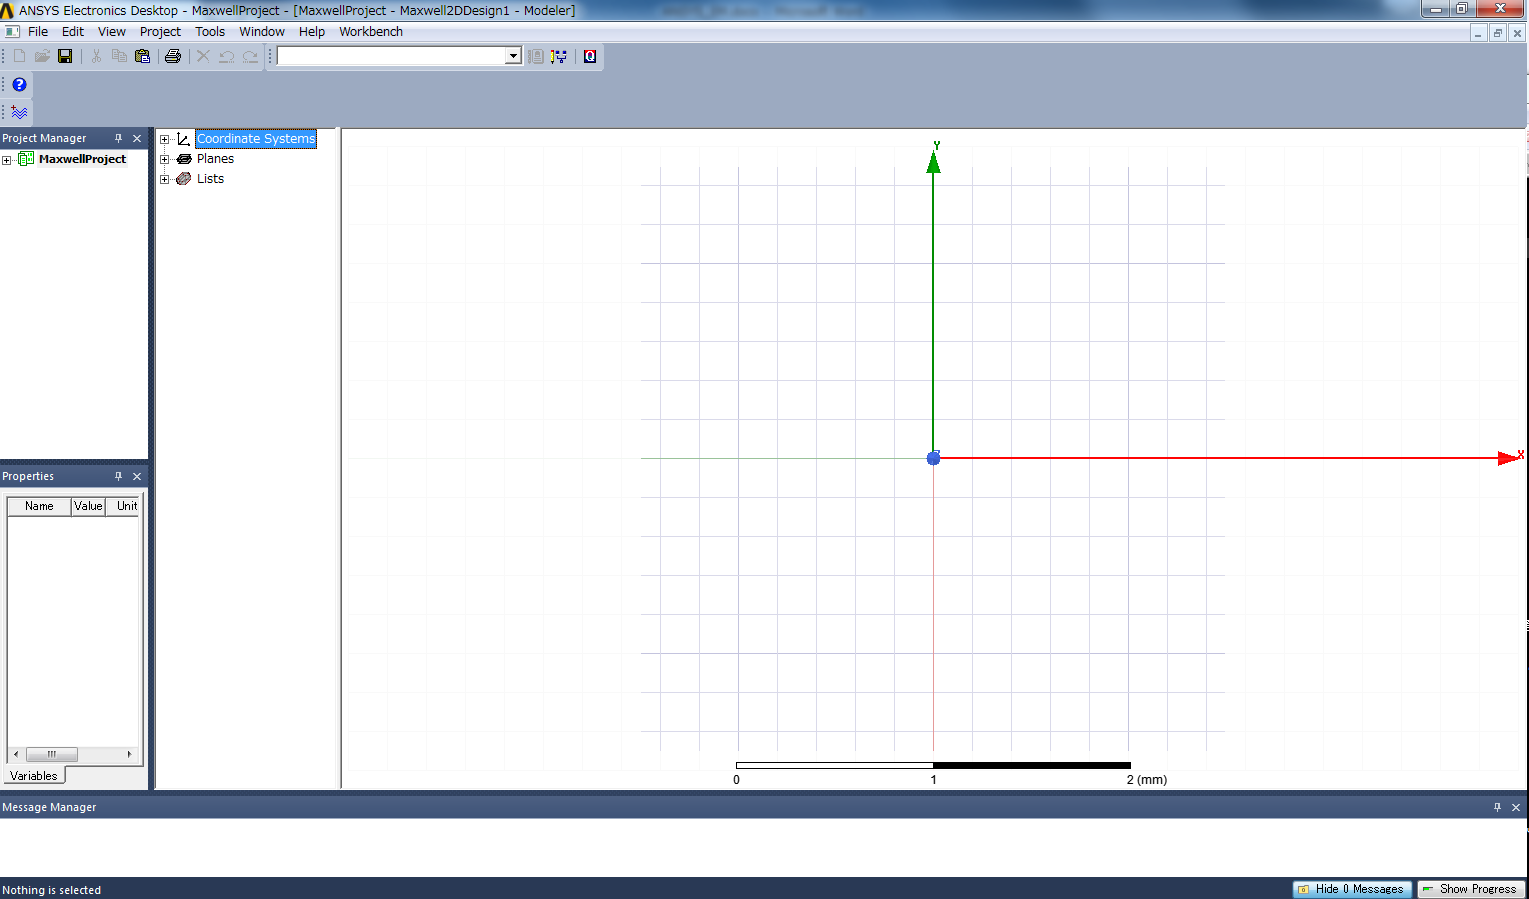
GeometryをダブルクリックするとElectronics Desktopが起動します。
「File」> [Close Desktop] で終了します。
6.2. Workbenchを経由しない起動
ANSYS Workbench経由ではなく、単体でANSYS Electronics Desktopを使用する場合は、ansysedtコマンドを実行します。
オプションを何も指定せずに実行すると、GUIモードで起動します。
$ ansysedt
-Helpオプションを付けて実行するとコマンドのオプションを確認できます。
-Batchoptionhelpオプションを付けて実行すると-batchoptionオプションの指定方法を確認できます。
並列計算の場合は、HPC License TypeにPoolを指定する必要があります。
SMP(1ノード、28コア使用)
$ ansysedt -monitor -ng -machinelist num=28 -batchoptions "'Maxwell 3D/HPCLicenseType'=Pool tempdirectory=$TMPDIR" -batchsolve Project.aedt
MPI(2ノード、56コア使用)
$ ansysedt -monitor -ng -machinelist num=56 -batchoptions "'Maxwell 3D/HPCLicenseType'=Pool tempdirectory=$TMPDIR" -distributed "includetypes=Variations,Frequencies,Transient Solver" -batchsolve Project.aedt
GPU(1ノード、28コア使用、GPU有効)
$ ansysedt -monitor -ng -machinelist num=56 -batchoptions "'HFSS/HPCLicenseType'=Pool 'HFSS/EnableGPU'=1 tempdirectory=$TMPDIR" -distributed "includetypes=Variations,Frequencies,Transient Solver" -batchsolve Project.aedt
6.3. バッチジョブスケジューラーへのジョブ投入
SMP並列、MPI並列、及びGPUを使用する場合のバッチジョブスクリプト例を以下に示します。
なお、これらの例は -auto オプションを使用した場合の例になります。
バッチスクリプト例:SMP(-autoオプションを使用する場合。-autoオプションを使用しない場合は、「Workbenchを経由しない起動」のコマンド例をご参照ください。)
# #!/bin/bash
#$ -cwd
#$ -l f_node=1
#$ -l h_rt=1:0:0

. /etc/profile.d/modules.sh
module load ansys/R18.2

INPUT=Project.aedt
OUTPUT=Project.out
NPROC=28
MACHINELIST=`awk -v np=${NPROC} '{print $1 ":-1:" np ":90%" }' ${PE_HOSTFILE} | tr '\n' ',' | sed -e "s/,$//g"`

ansysedt -monitor -ng -auto -machinelist list="${MACHINELIST}" -batchoptions "'Maxwell 3D/HPCLicenseType'=Pool tempdirectory=${TMPDIR}" -distributed  "includetypes=Variations,Frequencies,Transient Solver" -batchsolve ${INPUT} > ${OUTPUT}
バッチスクリプト例:GPU
#!/bin/bash
#$ -cwd
#$ -l f_node=1
#$ -l h_rt=12:0:0

. /etc/profile.d/modules.sh
module load ansys/R18.2

INPUT=Project.aedt
OUTPUT=Project.out
NPROC=28

. /etc/profile.d/modules.sh
module load ansys/R18.2

ansysedt -monitor -ng -machinelist num=${NPROC} -batchoptions "'Maxwell 2D/HPCLicenseType'=Pool 'Maxwell 2D/EnableGPU'=1 tempdirectory=${TMPDIR}" -batchsolve ${INPUT} > ${OUTPUT}
バッチスクリプト例:MPI(-autoオプションを使用する場合。-autoオプションを使用しない場合は、「Workbenchを経由しない起動」のコマンド例をご参照ください。)
#!/bin/bash
#$ -cwd
#$ -l f_node=2
#$ -l h_rt=12:0:0

. /etc/profile.d/modules.sh
module load ansys/R18.2

INPUT=Project.aedt
OUTPUT=Project.out
NPROC=28
MACHINELIST=`awk -v np=${NPROC} '{print $1 ":-1:" np ":90%" }' ${PE_HOSTFILE} | tr '\n' ',' | sed -e "s/,$//g"`

ansysedt -monitor -ng -auto -machinelist list="${MACHINELIST}" -batchoptions "'Maxwell 3D/HPCLicenseType'=Pool tempdirectory=${TMPDIR}" -distributed "includetypes=Variations,Frequencies,Transient Solver" -batchsolve ${INPUT} > ${OUTPUT}
6.4. ANSYS EM/HFSSのライセンスエラーの回避方法
ansys/20.1以降でANSYS ElectronicsやHFSSの一部機能を使用すると以下のエラーが発生することがあります。
Failed to enable feature using current license settings. Note that Pro, Premium, Enterprise licenses are available on your server.
これはANSYSのライセンス更新に伴いライセンス形態が変更になったことに起因するもので、回避するためには以下を実行して下さい。
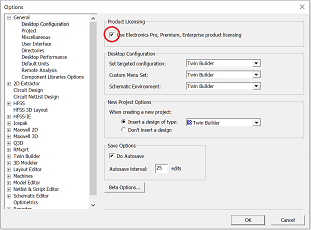
- クライアントPC側で、ANSYS Electronics Desktopを起動します。
- メニューの[Tools]-[Options]-[General] Options]をクリックします。
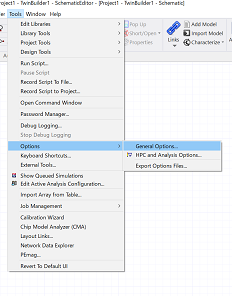
- [Use Electronics Pro,Premium,Enterprise product licensing]にチェックを入れます。