6. ISV application
Under the license agreement, users who can use the ISV application are limited.
Users other than "1. Student/Staff ID" who belong to Tokyo Tech can only use the following ISV applications.
- Gaussian/Gauss View
- AMBER(Only users affiliated with academic institutions)
- Intel Compiler
- PGI Compiler
- Arm Forge
The list of installed ISV applications is as follows.
| Software name | Description |
|---|---|
| ANSYS | Finite element software |
| Fluent | Finite volume software |
| ABAQUS | Finite element software |
| ABACUS CAE | Finite element software |
| Marc & Mentant / Dytran | Finite element software |
| Nastran | Finite element software |
| Patran | Finite element software Pre-Post tool |
| Gaussian | Computational chemistry Software |
| GaussView | Computational chemistry Software Pre-Post tool |
| AMBER | Computational chemistry Software |
| Materials Studio | Computational chemistry Software |
| Discovery Studio | Computational chemistry Software |
| Mathematica | Mathematical symbolic computation program |
| Maple | Mathematica l symbolic computation program |
| AVS/Express | Visualization software |
| AVS/Express PCE | Visualization software |
| LS-DYNA | Finite element software |
| LS-PrePost | Finite element software Pre-Post tool |
| COMSOL | Finite element software |
| Schrodinger | Computational chemistry Software |
| MATLAB | Mathematical software |
| Arm Forge | Debugger |
| Intel Compiler | Compiler |
| PGI Compiler | Compiler |
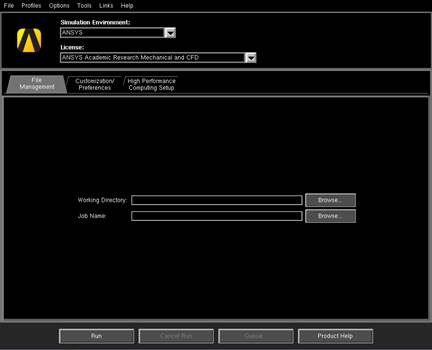
6.1. ANSYS
You could run interactive use like in these examples.
GUI
$ module load ansys
$ launcher
CLI
$ module load ansys
$ mapdl
The following command could be used instead of the mapdl command.
When ANSYS 18.2 is loaded. The name of the command is different among the versions.
$ ansys182
You could also specify the input file to run it with batch mode.
Example 1:
$ mapdl [options] < inputfile > outputfile
Example 2:
$ mapdl [options] -i inputfile -o outputfile
You could submit a batch job like in this example.
#### in case, sample.sh
$ qsub sample.sh
The following is a sample job script for MPI
#!/bin/bash
#$ -cwd
#$ -V
#$ -l f_node=2
#$ -l h_rt=0:10:0

. /etc/profile.d/modules.sh
module load ansys

mapdl -b -dis -np 56 < inputfile > outputfile
A sample script for GPU
#!/bin/bash
#$ -cwd
#$ -V
#$ -l f_node=1
#$ -l h_rt=0:10:0

. /etc/profile.d/modules.sh
module load ansys

mapdl -b -dis -np 28 -acc nvidia -na 4 < inputfile > outputfile
When you execute the following command, license Usage Status is displayed.
$ lmutil lmstat -S ansyslmd -c 27001@lice0:27001@remote:27001@t3ldap1
6.2. Fluent
You can start with the following commands:
GUI
$ module load ansys
$ fluent
CLI
$ module load ansys
$ fluent -g
You could run interactive use like in this example.
When the input file name is fluentbench, you and run with 3D version:
$fluent 3d -g -i fluentbench.jou
## in case, sample.sh
$ qsub sample.sh
The following is a sample job script: MPI parallel (f_node)
#!/bin/bash
#$ -cwd
#$ -V
#$ -l f_node=2
#$ -l h_rt=0:10:0

. /etc/profile.d/modules.sh
module load ansys

JOURNAL=journalfile
OUTPUT=outputfile
VERSION=3d

fluent -mpi=intel -g ${VERSION} -cnf=${PE_HOSTFILE} -i ${JOURNAL} > ${OUTPUT} 2>&1
The following is a sample job script: MPI parallel (h_node)
#!/bin/bash
#$ -cwd
#$ -V
#$ -l h_node=1
#$ -l h_rt=0:30:0

. /etc/profile.d/modules.sh
module load ansys

JOURNAL=journalfile
OUTPUT=outputfile
VERSION=3d

fluent -ncheck -mpi=intel -g ${VERSION} -cnf=${PE_HOSTFILE} -i ${JOURNAL} > ${OUTPUT} 2>&1
Since it is not possible to set across resources using f_node, set #$ -l {resource name}=1 (for example, #$ -l h_node=1 for h_node) and include the "-ncheck" option in the command.
When you execute the following command, license Usage Status is displayed.
$ lmutil lmstat -S ansyslmd -c 27001@lice0:27001@remote:27001@t3ldap1
6.3. ABAQUS
You could run interactive use like in this example.
$ module load abaqus
$ abaqus job=inputfile [options]
You could submit a batch job like in this example.
#### in case, sample.sh
$ qsub sample.sh
The following is a sample job script: MPI parallel
#!/bin/bash
#$ -cwd
#$ -V
#$ -l q_core=1
#$ -l h_rt=0:10:0

. /etc/profile.d/modules.sh
module load abaqus

## ABAQUS settings.
INPUT=s2a
ABAQUS_VER=2017
ABAQUS_CMD=abq${ABAQUS_VER}
SCRATCH=${base_dir}/scratch
NCPUS=2

cd ${base_dir}

${ABAQUS_CMD} interactive \
job=${INPUT} \
cpus=${NCPUS} \
scratch=${SCRATCH} \
mp_mode=mpi > ${INPUT}.`date '+%Y%m%d%H%M%S'`log 2>&1
6.4. ABAQUS CAE
You can start with the following commands:
$ module load abaqus
$ abaqus cae
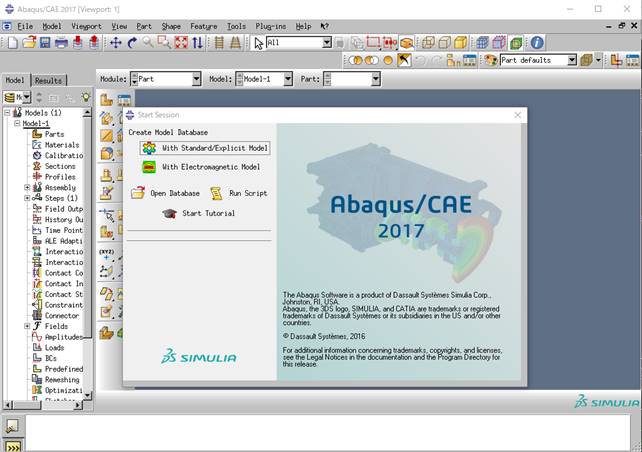
Click File> Exit on the menu bar to exit.
6.5. Marc & Mentat / Dytran
6.5.1. Overview
For an overview of each product, please refer to the website of MSC Software Corporation.
- Marc: http://www.mscsoftware.com/ja/product/marc
- Dytran: http://www.mscsoftware.com/ja/product/dytran
6.5.2. Documentations
Please refer following documentations.
- Marc & Mentat Docs (mscsoftware.com)
- Dytran Docs (mscsoftware.com)
6.5.3. Marc
You could run interactive use like in this example.
$ module load intel intel-mpi cuda marc_mentat/2017
#### in case, sample file (e2x1.dat)
$ cp /apps/t3/sles12sp2/isv/msc/marc/marc2017/demo/ e2x1.dat ./
$ marc -jid e2x1
6.5.4. Mentat
You can start with the following commands:
$ cd <work directory>
$ module load intel intel-mpi cuda marc_mentat/2017
$ mentat
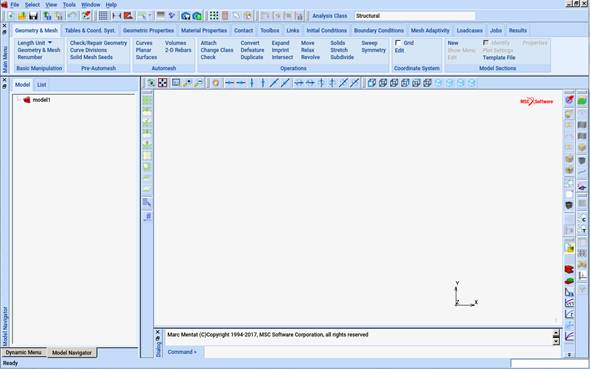
Click File> Exit on the menu bar to exit.
When you execute the following command, license Usage Status is displayed.
$ lmutil lmstat -S MSC -c 27004@lice0:27004@remote:27004@t3ldap1
6.6. Nastran
You can start with the following commands:
$ module load nastran/2017.1
## In case, sample file (um24.dat)
$ cp /apps/t3/sles12sp2/isv/msc/MSC_Nastran/20171/msc20171/nast/demo/um24.dat ./
$ nast20171 um24
You could submit a batch job like in this example.
## In case, sample (parallel.sh)
$ qsub parallel.sh
The following is a sample job script:
#!/bin/bash
#$ -cwd
#$ -N nastran_parallel_test_job
#$ -l q_core=1
#$ -l h_rt=0:10:00
#$ -V

export NSLOTS=4

. /etc/profile.d/modules.sh
module load cuda openmpi nastran/2017.1


mpirun -np $NSLOTS \
nast20171 parallel=$NSLOTS um24
When you execute the following command, license Usage Status is displayed.
$ lmutil lmstat -S MSC -c 27004@lice0:27004@remote:27004@t3ldap1
6.7. Patran
You can start with the following commands:
$ module load patran/2017.0.2
$ pat2017

Click File> Exit on the menu bar to exit.
When you execute the following command, license Usage Status is displayed.
$ lmutil lmstat -S MSC -c 27004@lice0:27004@remote:27004@t3ldap1
6.8. Gaussian
You can start with the following commands:
You can run interactive use like in this example.
Using the module for GPUs (GAUSS_CDEF and GAUSS_GDEF environmental variables will be set):
$ module load gaussian16/revision_gpu
$ g16 inputfile

Specify Gaussian’s revision to revision. The example below is the case of Gaussian 16 Rev. B01.
$ module load gaussian16/B01_gpu
Using the non-GPU module (GAUSS_CDEF and GAUSS_GDEF not be set in the module):
$ module load gaussian16/revision
$ g16 inputfile
Using Linda:
$ module load gaussian16_linda
$ g16 inputfile
You could submit a batch job like in this example.
#### in case, sample.sh
$ qsub sample.sh
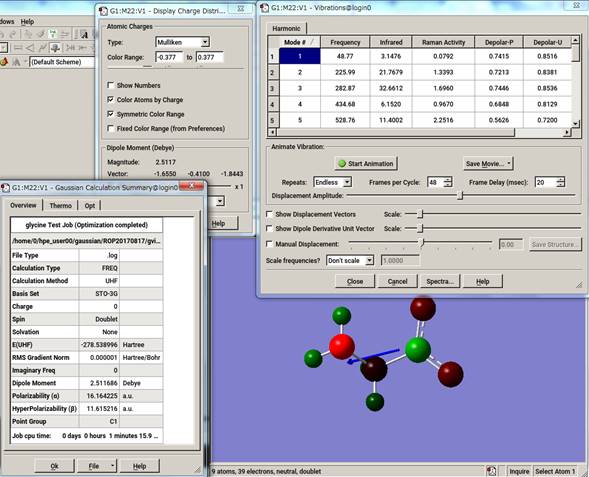
The following is a set of sample scripts for calculating the geometry optimization and vibration analysis (IR + Raman intensity) of glycine:
glycine.sh
#!/bin/bash
#$ -cwd
#$ -l f_node=1
#$ -l h_rt=0:10:0
#$ -V

. /etc/profile.d/modules.sh
module load gaussian16

g16 glycine.gjf
%chk=glycine.chk
%cpu=0-27    <- No need to describe when GAUSS_CDEF and GAUSS_CDEF are set.
%gpucpu=0-3=0,1,2,3    <- No need to describe when GAUSS_CDEF and GAUSS_CDEF are set or when you will not use GPUs.
%mem=120GB
#P opt=(calcfc,tight,rfo) freq=(raman)

glycine Test Job

0 2
 N                0   -2.15739574   -1.69517043   -0.01896033 H
 H                0   -1.15783574   -1.72483643   -0.01896033 H
 C                0   -2.84434974   -0.41935843   -0.01896033 H
 C                0   -1.83982674    0.72406557   -0.01896033 H
 H                0   -3.46918274   -0.34255543   -0.90878333 H
 H                0   -3.46918274   -0.34255543    0.87086267 H
 O                0   -0.63259574    0.49377357   -0.01896033 H
 O                0   -2.22368674    1.89158057   -0.01896033 H
 H                0   -2.68286796   -2.54598119   -0.01896033 H

 1 2 1.0 3 1.0 9 1.0
 2
 3 4 1.0 5 1.0 6 1.0
 4 7 1.5 8 1.5
 5
 6
 7
 8
 9
After calculation, glycinetest.log, glycinetest.chk will be generated.
See GaussViewor verifying the analysis result.
6.9. GaussView
You can start with the following commands:
$ module load gaussian16 gaussview
$ gview.exe
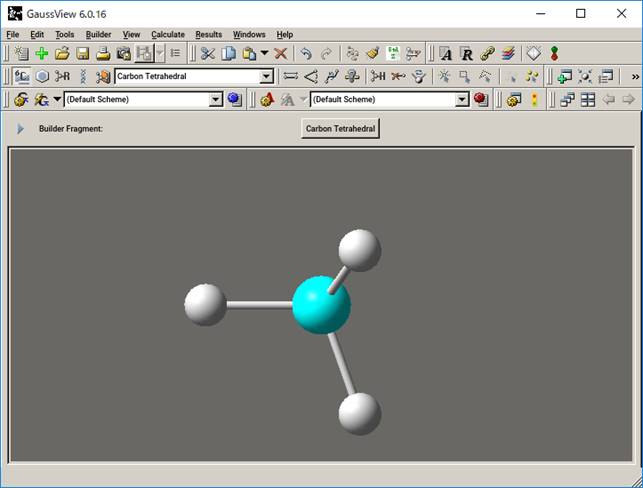
Click File> Exit on the menu bar to exit.
Example: glycine.log
$ module load gaussian16 gaussview
$ gview.exe glycine.log
The result of the analysis can be confirmed from [Result].
You can check calculation overview, charge information and vibration analysis from [Summary], [Charge Distribution] and [Vibration], respectively.
Since vibration analysis was performed in this example, the state of vibration can be confirmed from the [Start Animation] in the Vibration dialog.
6.10. AMBER
(1) You could run interactive use like in this example: CPU serial
$ module load amber/16
$ sander [-O|A] -i mdin -o mdout -p prmtop -c inpcrd -r restrt
(2) You could run interactive use like in this example: CPU parallel (sander.MPI)
$ module load amber/16
$ mpirun -np -[Number of processes] sander.MPI [-O|A] -i mdin -o mdout -p prmtop -c inpcrd -r restrt
$ module load amber/16_cuda
$ pmemd.cuda [-O] -i mdin -o mdout -p prmtop -c inpcrd -r restrt
(4) You could run interactive use like in this example: GPU parallel (pmemd.cuda.MPI)
$ module load amber/16_cuda
$ mpirun -np -[Number of processes] pmemd.cuda.MPI [-O] -i mdin -o mdout -p prmtop -c inpcrd -r restrt
(5) You could submit a batch job like in this example.
## in case, parallel.sh
$ qsub parallel.sh
The following is a sample job script: CPU parallel
#!/bin/bash
#$ -cwd
#$ -l f_node=2
#$ -l h_rt=0:10:00
#$ -V
export NSLOTS=56

in=./mdin
out=./mdout_para
inpcrd=./inpcrd
top=./top

cat <<eof > $in
 Relaxtion of trip cage using
&cntrl
  imin=1,maxcyc=5000,irest=0, ntx=1,
  nstlim=10, dt=0.001,
  ntc=1, ntf=1, ioutfm=1
  ntt=9, tautp=0.5,
  tempi=298.0, temp0=298.0,
  ntpr=1, ntwx=20,
  ntb=0, igb=8,
  nkija=3, gamma_ln=0.01,
  cut=999.0,rgbmax=999.0,
  idistr=0
 /
eof

. /etc/profile.d/modules.sh
module load amber/16

mpirun -np $NSLOTS \
sander.MPI -O -i $in -c $inpcrd -p $top -o $out < /dev/null

/bin/rm -f $in restrt
The following is a sample job script: GPU parallel
#!/bin/bash
#$ -cwd
#$ -l f_node=2
#$ -l h_rt=0:10:0
#$ -V

export NSLOTS=56

in=./mdin
out=./mdout
inpcrd=./inpcrd
top=./top

cat <<eof > $in
FIX (active) full dynamics ( constraint dynamics: constant volume)
&cntrl
   ntx = 7,       irest = 1,
   ntpr = 100,     ntwx = 0,     ntwr = 0,
   ntf = 2,       ntc = 2,       tol = 0.000001,
   cut = 8.0,
   nstlim = 500,  dt = 0.00150,
   nscm = 250,
   ntt = 0,
   lastist = 4000000,
   lastrst = 6000000,
 /
eof

. /etc/profile.d/modules.sh
module load amber/16_cuda

mpirun -np $NSLOTS \
pmemd.cuda.MPI -O -i $in -c $inpcrd -p $top -o $out < /dev/null

/bin/rm -f $in restrt
6.11. Materials Studio
6.11.1. License connection setting
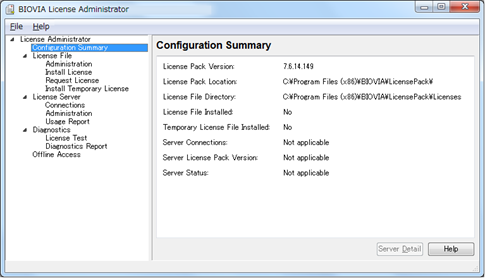
Execute All Programs > BIOVIA > Licensing > License Administrator 7.6.14 from the Windows [Start menu] with system administrator privileges.

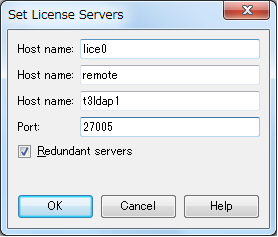
Click [Connections] -[Set] , and open "Set License Server" dialog.
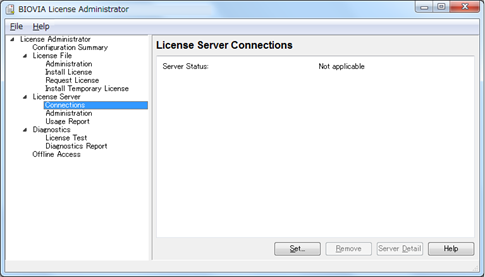
Select Redundant Server and type each host name and a port number.

If server status is displayed as "Connected", setting is completed.
(note) You need to establish a connection with two or more license servers.
6.11.2. License Usage Status
6.11.2.1. On Windows
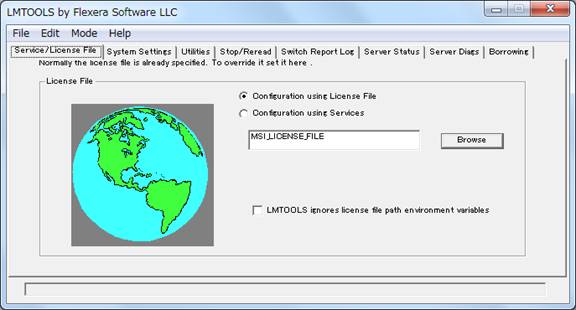
Execute All Programs > BIOVIA > Licensing > License Administrator 7.6.14 > Utilities (FLEXlm LMTOOLs) from the Windows [Start menu] .
Open [Service/License File] tab and slect [Configulation using License File] .
Make sure that MSI_LICENSE_FILE is displayed.

Open [Server Status] tab, click [Perform Status Enqurity] and you can see usage status of the license.
If you want to display only specific licenses, enter the license name that you want to display in [Individual Feature] and execute [Perform Status Enqurity].
6.11.2.2. On login node
When you execute the following command, license Usage Status is displayed.
$ lmutil lmstat -S msi -c 27005@lice0,27005@remote,27005@t3ldap1
6.11.3. Start up Materials Studio
Click BIOVIA > Materials Studio 2017 R2 from the Windows [Start menu].
6.12. Discovery Studio
6.12.1. License connection setting
Execute All Programs > BIOVIA > Licensing > License Administrator 7.6.14 from the Windows [Start menu] with system administrator privileges.
Click [Connections] -[Set] , and open "Set License Server" dialog.

Select Redundant Server and type each host name and a port number.
If server status is displayed as "Connected," the setting is completed.
(note) You need to establish a connection with two or more license servers.
6.12.2. License Usage Status
6.12.2.1. On Windows
Execute All Programs > BIOVIA > Licensing > License Administrator 7.6.14 > Utilities (FLEXlm LMTOOLs) from the Windows [Start menu] .
Open [Service/License File] tab and slect [Configulation using License File] .
Make sure that MSI_LICENSE_FILE is displayed.
Open [Server Status] tab, click [Perform Status Enqurity] and you can see usage status of the license.
If you want to display only specific licenses, enter the license name that you want to see in [Individual Feature] and execute [Perform Status Enqurity].
6.12.2.2. On login node
When you execute the following command, usage status is displayed.
$ lmutil lmstat -S msi -c 27005@lice0,27005@remote,27005@t3ldap1
6.12.3. Start up Discovery Studio
Click BIOVIA > Discovery Studio 2017 R2 64-bit Client from the Windows [Start menu] .
6.13. Mathematica
You can start with the following commands:
CLI
$ module load mathematica
$ math
Mathematica 11.1.1 Kernel for Linux x86 (64-bit)
Copyright 1988-2017 Wolfram Research, Inc.

In[1]:=
GUI
$ module load mathematica
$ Mathematica

To exit the Wolfram System, you typically choose the "Exit" menu item in the notebook interface.
6.14. Maple
You can start with the following commands:
CLI
$ module load maple/2016.2
$ maple
    |\^/|     Maple 2016 (X86 64 LINUX)
._|\|   |/|_. Copyright (c) Maplesoft, a division of Waterloo Maple Inc. 2018
 \  MAPLE  /  All rights reserved. Maple is a trademark of
 <____ ____>  Waterloo Maple Inc.
      |       Type ? for help.
>
Type Quit to exit.
GUI
$ module load maple/2016.2
$ xmaple
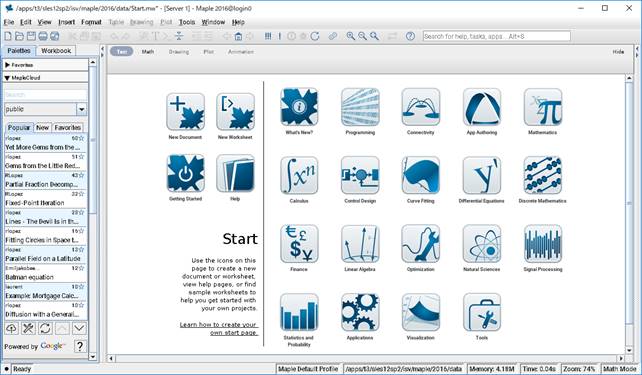
Click File> Exit on the menu bar to exit.
When you execute the following command, license Usage Status is displayed.
$ lmutil lmstat -S maplelmg -c 27007@lice0:27007@remote:27007@t3ldap1
6.15. AVS/Express
You can start with the following commands:
$ module load avs/8.4
$ xp
The option "nohw" is needed to start without hardware acceleration.
Click File> Exit on the menu bar to exit.
When you execute the following command, license Usage Status is displayed.
$ w3m http://lice0:33333/STATUS
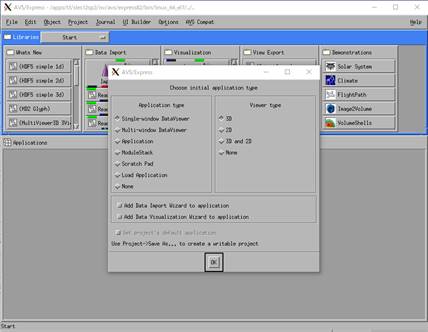
6.16. AVS/Express PCE
You can start with the following commands:
$ module load avs/8.4
$ para_start
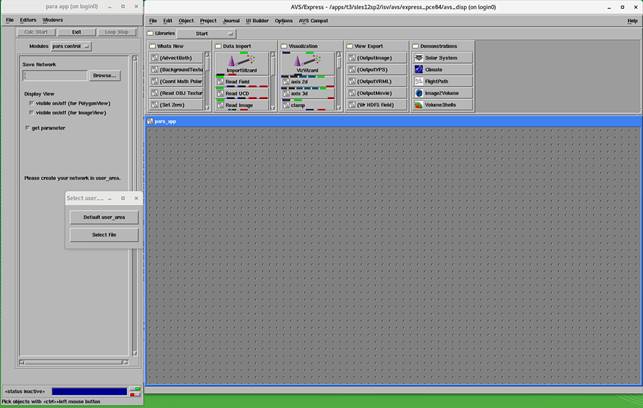
Click File> Exit on the menu bar to exit.
When you execute the following command, license Usage Status is displayed.
$ w3m http://lice0:33333/STATUS
6.17. LS-DYNA
6.17.1. Overview LS-DYNA
LS-DYNA is a general-purpose finite element program capable of simulating complex real-world problems. It is used by the automobile, aerospace, construction, military, manufacturing, and bioengineering industries.
6.17.2. Executing LS-DYNA
You can use the following sample scripts to submit jobs.
Please replace input files and versions appropriately.
[SMP in sigle precision]
#!/bin/bash
#$ -cwd
#$ -V
#$ -l h_node=1
#$ -l h_rt=0:10:0

. /etc/profile.d/modules.sh
module load cuda/8.0.44
module load lsdyna/R9.1.0

export base_dir=/home/4/t3-test00/isv/lsdyna
cd $base_dir/smp_s

export exe=smpdynas

#export LSTC_LICENSE=network
#export LSTC_MEMORY=auto

export NCPUS=4
export OMP_NUM_THREADS=${NCPUS}
export INPUT=$base_dir/sample/airbag_deploy.k

${exe} i=${INPUT} ncpus=${NCPUS}
[SMP in double precision]
#!/bin/bash
#$ -cwd
#$ -V
#$ -l h_node=1
#$ -l h_rt=0:10:0

. /etc/profile.d/modules.sh
module load cuda/8.0.44
module load lsdyna/R9.1.0

export base_dir=/home/4/t3-test00/isv/lsdyna
cd $base_dir/smp_d

export exe=smpdynad

#export LSTC_LICENSE=network
#export LSTC_MEMORY=auto

export NCPUS=4
export OMP_NUM_THREADS=${NCPUS}
export INPUT=$base_dir/sample/airbag_deploy.k

${exe} i=${INPUT} ncpus=${NCPUS}
[MPP in sigle precision]
#!/bin/bash
#$ -cwd
#$ -V
#$ -l h_node=1
#$ -l h_rt=0:10:0

. /etc/profile.d/modules.sh
module load cuda/8.0.44
module load lsdyna/R9.1.0 mpt/2.16

export base_dir=/home/4/t3-test00/isv/lsdyna
cd $base_dir/mpp_s

export exe=mppdynas_avx2
export dbo=l2as_avx2

#export LSTC_LICENSE=network
#export LSTC_MEMORY=auto

export NCPUS=4
export OMP_NUM_THREADS=1
export INPUT=$base_dir/sample/airbag_deploy.k

export MPI_BUFS_PER_PROC=512
export MPI_REMSH=ssh

mpiexec_mpt -v -np 4 dplace -s1 ${exe} i=${INPUT} ncpus=${NCPUS}
${dbo} binout*
Info
Instead of standalone LS-DYNA with lsdyna module, you can choose LS-DYNA included in ANSYS (ansys module).
Please refer to the following example job scirpt for necessary configurations.
#!/bin/bash
#$ -cwd
#$ -V
#$ -l h_node=1
#$ -l h_rt=5:00:0

. /etc/profile.d/modules.sh

module load ansys intel-mpi

export dynadir=/apps/t3/sles12sp2/isv/ansys_inc/v231/ansys/bin/linx64/
export exe=$dynadir/lsdyna_sp_mpp.e
export dbo=$dynadir/lsl2a_sp.e

export LSTC_LICENSE_SERVER='(27008@lice0 27008@remote 27008@t3ldap1)'
export NCPUS=4
export INPUT=$base_dir/sample/airbag_deploy.k

mpiexec -np ${NCPUS} ${exe} i=${INPUT}

${dbo} binout*
[MPP in doble precision]
#!/bin/bash
#$ -cwd
#$ -V
#$ -l h_node=1
#$ -l h_rt=0:10:0

. /etc/profile.d/modules.sh
module load cuda/8.0.44
module load lsdyna/R9.1.0 mpt/2.16

export base_dir=/home/4/t3-test00/isv/lsdyna
cd $base_dir/mpp_d

export exe=mppdynad_avx2
export dbo=l2ad_avx2

#export LSTC_LICENSE=network
#export LSTC_MEMORY=auto

export NCPUS=4
export OMP_NUM_THREADS=1
export INPUT=$base_dir/sample/airbag_deploy.k

export MPI_BUFS_PER_PROC=512
export MPI_REMSH=ssh

mpiexec_mpt -v -np 4 dplace -s1 ${exe} i=${INPUT} ncpus=${NCPUS}

${dbo} binout*
Info
Instead of standalone LS-DYNA with lsdyna module, you can choose LS-DYNA included in ANSYS (ansys module).
Please refer to the following example job scirpt for necessary configurations.
#!/bin/bash
#$ -cwd
#$ -V
#$ -l h_node=1
#$ -l h_rt=5:00:0

. /etc/profile.d/modules.sh

module load ansys intel-mpi

export dynadir=/apps/t3/sles12sp2/isv/ansys_inc/v231/ansys/bin/linx64/
export exe=$dynadir/lsdyna_dp_mpp.e
export dbo=$dynadir/lsl2a_dp.e

export LSTC_LICENSE_SERVER='(27008@lice0 27008@remote 27008@t3ldap1)'
export NCPUS=4
export INPUT=$base_dir/sample/airbag_deploy.k

mpiexec -np ${NCPUS} ${exe} i=${INPUT}

${dbo} binout*
Please change the script according to the user's environment.
The input file is specified as INPUT=inputfile in the shell script.
When you execute the following command, license Usage Status is displayed.
$ lstc_qrun
6.18. LS-PrePost
6.18.1. Overview LS-PrePost
LS-PrePost is an advanced pre and post-processor that is delivered free with LS-DYNA. The user interface is designed to be both efficient and intuitive. LS-PrePost runs on Windows, Linux, and Unix utilizing OpenGL graphics to achieve fast rendering and XY plotting.
6.18.2. Executing LS-PrePost
You can start with the following commands:
$ module load lsprepost/4.3
$ lsprepost

_____________________________________________________
 |                                                   |
 |     Livermore Software Technology Corporation          |
 |                                                   |
 |                L S - P R E P O S T                     |
 |                                                   |
 |    Advanced Pre- and Post-Processor for LS-DYNA         |
 |                                                   |
 |         LS-PrePost(R) V4.3.11 - 04Jul2017               |
 |                                                   |
 |            LSTC Copyright (C) 1999-2014               |
 |                All Rights Reserved                    |
 |___________________________________________________|

 OpenGL version 3.0 Mesa 11.2.1

Click File> Exit on the menu bar to exit.
6.19. COMSOL
You can start with the following commands:
$ module load comsol
$ comsol
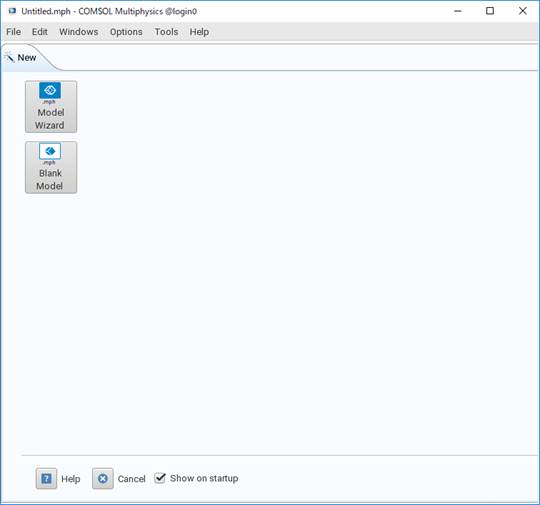
Click File> Exit on the menu bar to exit.
When you execute the following command, license Usage Status is displayed.
$ lmutil lmstat -S LMCOMSOL -c 27009@lice0:27009@remote:27009@t3ldap1
6.20. Schrodinger
You can start with the following commands:
CLI
$ module load schrodinger/Feb-17
$ ligprep -ismi <input file> -omae <output file>
GUI
$ module load schrodinger/Feb-17
$ maestro
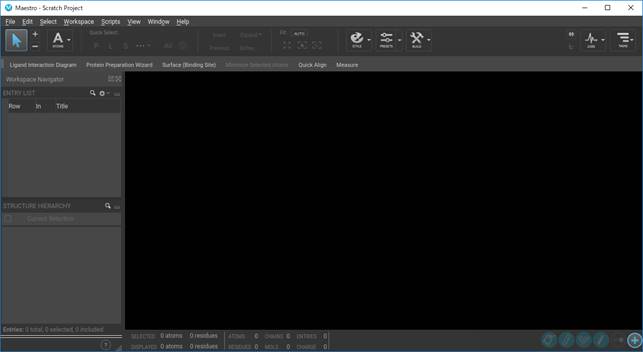
Click File> Exit on the menu bar to exit.
When you execute the following command, license Usage Status is displayed.
$ lmutil lmstat -S SCHROD -c 27010@lice0:27010@remote:27010@t3ldap1
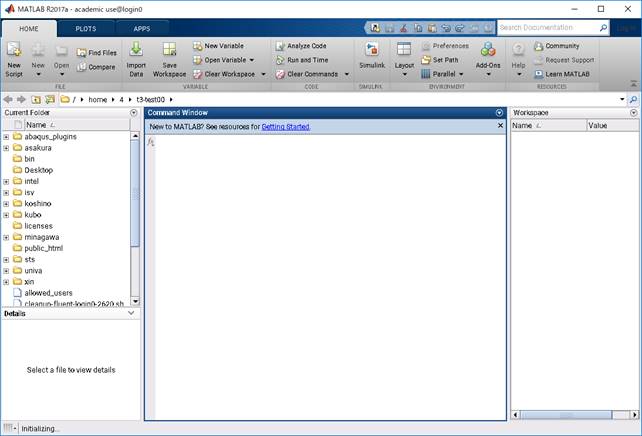
6.21. MATLAB
You can start with the following commands:
GUI
$ module load matlab
$ matlab
CLI
$ module load matlab
$ matlab -nodisplay
When you execute the following command, license Usage Status is displayed.
$ lmutil lmstat-S MLM -c 27014@lice0:27014@remote:27014@t3ldap1
6.22. Arm Forge
You can start with the following commands:
$ module load forge
$ forge
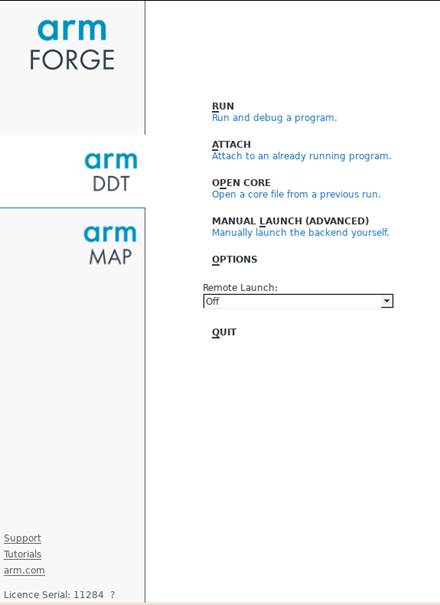
Click File> Exit on the menu bar to exit.