7. Freeware
End of operation
TSUBAME3 is not in operation any more. You can find TSUBAME4 manuals here
The list of the installed freeware is as follows:
| Software name | Description |
|---|---|
| GAMESS | Computational chemistry Software |
| Tinker | Computational chemistry Software |
| GROMACS | Computational chemistry Software |
| LAMMPS | Computational chemistry Software |
| NAMMD | Computational chemistry Software |
| CP2K | Computational chemistry Software |
| QUANTUM ESPRESSO | Computational chemistry Software |
| OpenFOAM | Computational Software |
| CuDNN | GPU library |
| NCCL | GPU library |
| Caffe | DeepLearning Framework |
| Chainer | DeepLearning Framework |
| TensorFlow | DeepLearning Framework |
| DeePMD-kit | DeepLearning Framework for MD |
| R | statistics Interpreter |
| clang | compiler |
| Apache Hadoop | Distributed data processing tool |
| POV-Ray | Visualization software |
| ParaView | Visualization software |
| VisIt | Visualization software |
| turbovnc | Remote GUI |
| gnuplot | Data visualization |
| Tgif | Graphics tool |
| GIMP | Image display and manipulation |
| ImageMagick | Image display and manipulation |
| TeX Live | TeX distribution |
| Java SDK | Development environment |
| PETSc | Scientific Computation Library |
| FFTW | FFT library |
| DMTCP | Checkpoint tool |
| Singularity | Linux container for HPC |
7.1. Computational chemistry Software
7.1.1. GAMESS
The following is a sample job script.
#!/bin/bash
#$ -cwd
#$ -l f_node=1
#$ -l h_rt=0:10:0
#$ -N gamess

. /etc/profile.d/modules.sh
module load intel intel-mpi gamess

cat $PE_HOSTFILE | awk '{print $1}' > $TMPDIR/machines
cd $GAMESS_DIR
./rungms exam08 mpi 4 4
For more details, please refer the following site: https://www.msg.ameslab.gov/gamess/index.html
7.1.2. Tinker
The following is a sample job script.
#!/bin/bash
#$ -cwd
#$ -l f_node=1
#$ -l h_rt=0:10:0
#$ -N tinker

. /etc/profile.d/modules.sh
module load intel tinker

cp -rp $TINKER_DIR/example $TMPDIR
cd $TMPDIR/example
dynamic waterbox.xyz -k waterbox.key 100 1 1 2 300
cp -rp $TMPDIR/example $HOME
For more details, please refer the following site: https://dasher.wustl.edu/tinker/
7.1.3. GROMACS
The following is a sample job script.
#!/bin/bash
#$ -cwd
#$ -l f_node=1
#$ -l h_rt=0:10:0
#$ -N gromacs

. /etc/profile.d/modules.sh

module load cuda/11.2.146 intel-mpi python/3.11.2 gcc/10.2.0 gromacs
cp -rp $GROMACS_DIR/examples/water_GMX50_bare.tar.gz $TMPDIR
cd $TMPDIR
tar xf water_GMX50_bare.tar.gz
cd water-cut1.0_GMX50_bare/3072
gmx_mpi grompp -f pme.mdp
OMP_NUM_THREADS=2 mpiexec.hydra -np 4 gmx_mpi mdrun
cp -rp $TMPDIR/water-cut1.0_GMX50_bare $HOME
For more details, please refer the following site: http://www.gromacs.org/
7.1.4. LAMMPS
The following is a sample job script.
#!/bin/bash
#$ -cwd
#$ -l f_node=1
#$ -l h_rt=0:10:0
#$ -N lammps

. /etc/profile.d/modules.sh

module load intel cuda openmpi/3.1.4-opa10.10-t3 ffmpeg python/3.11.2 lammps
cp -rp $LAMMPS_DIR/examples/VISCOSITY $TMPDIR
cd $TMPDIR/VISCOSITY
mpirun -x PATH -x LD_LIBRARY_PATH -x PSM2_CUDA=1 -np 4 lmp -pk gpu 0 -in in.gk.2d
cp -rp $TMPDIR/VISCOSITY $HOME
For more details, please refer the following site: http://lammps.sandia.gov/doc/Section_intro.html
7.1.5. NAMD
The following is a sample job script.
#!/bin/bash
#$ -cwd
#$ -l f_node=1
#$ -l h_rt=0:10:0
#$ -N namd

. /etc/profile.d/modules.sh
module load cuda intel namd

cp -rp $NAMD_DIR/examples/stmv.tar.gz $TMPDIR
cd $TMPDIR
tar xf stmv.tar.gz
cd stmv
namd3 +idlepoll +p4 +devices 0,1,2,3 stmv.namd
cp -rp $TMPDIR/stmv $HOME
Info
Command name is namd2 on older versions, please replace namd3 with namd2 when you use them.
For more details, please refer the following site: https://www.ks.uiuc.edu/Research/namd/3.0/ug/
7.1.6. CP2K
The following is a sample job script.
#$ -cwd
#$ -l f_node=1
#$ -l h_rt=0:10:0
#$ -N cp2k

. /etc/profile.d/modules.sh
module load cuda gcc openmpi/3.1.4-opa10.10-t3 cp2k
cp -rp $CP2K_DIR/benchmarks/QS $TMPDIR
cd $TMPDIR/QS
export OMP_NUM_THREADS=1
mpirun -x PATH -x LD_LIBRARY_PATH -x PSM2_CUDA=1 -np 4 cp2k.psmp -i H2O-32.inp -o H2O-32.out
cp -rp $TMPDIR/QS $HOME
For more details, please refer the following site: https://www.cp2k.org/
7.1.7. QUANTUM ESPRESSO
The following is a sample job script.
#!/bin/sh
#$ -cwd
#$ -l h_rt=00:10:00
#$ -l f_node=1
#$ -N q-e
. /etc/profile.d/modules.sh

module purge
module load cuda/10.2.89 pgi openmpi/3.1.4-opa10.10-t3 quantumespresso

cp -p $QUANTUMESPRESSO_DIR/test-suite/pw_scf/scf.in .
cp -p $QUANTUMESPRESSO_DIR/example/Si.pz-vbc.UPF .

mpirun -x ESPRESSO_PSEUDO=$PWD -x PATH -x LD_LIBRARY_PATH -x PSM2_CUDA=1 -x PSM2_GPUDIRECT=1 -np 4 pw.x < scf.in
For more details, please refer the following site: https://www.quantum-espresso.org/
7.2. CFD software
7.2.1. OpenFOAM
There are two versions of OpenFOAM, Foundation version is named "openfoam" and ESI version is named "openfoam-esi".
The following is a sample job script.
#!/bin/bash
#$ -cwd
#$ -l f_node=1
#$ -l h_rt=0:10:0
#$ -N openform

. /etc/profile.d/modules.sh
module load cuda openmpi openfoam

mkdir -p $TMPDIR/$FOAM_RUN
cd $TMPDIR/$FOAM_RUN
cp -rp $FOAM_TUTORIALS .
cd tutorials/incompressible/icoFoam/cavity/cavity
blockMesh
icoFoam
paraFoam
If you want to use ESI version, please replace module load cuda openmpi openfoam with module load cuda openmpi openfoam-esi.
For more details, please refer the following site:
https://openfoam.org/resources/
http://www.openfoam.com/documentation/
7.3. Numerical GPU libraries
7.3.1. cuBLAS
cuBLAS is BLAS(Basic Linear Algebra Subprograms) library for GPU.
usage
$ module load cuda
$ nvcc -gencode arch=compute_60,code=sm_60 -o sample sample.cu -lcublas
If you need to call cuBLAS in the usual C program, -I, -L and -l options are required in the compilation.
$ module load cuda
$ gcc -o blas blas.c -I${CUDA_HOME}/include -L${CUDA_HOME}/lib64 -lcublas
7.3.2. cuSPARSE
cuSPARSE is sparse matrix computation library for nvidia GPU.
usage
$ module load cuda
$ nvcc -gencode arch=compute_60,code=sm_60 sample.cu -lcusparse -o sample
If you need to call cuSPARSE in the usual C program, -I, -L and -l options are required in the compilation.
$ module load cuda
$ g++ sample.c -lcusparse_static -I${CUDA_HOME}/include -L${CUDA_HOME}/lib64  -lculibos -lcudart_static -lpthread -ldl -o sample
7.3.3. cuFFT
cuFFT is parallel FFT(Fast Fourier Transformation) library for nvidia GPU.
usage
$ module load cuda
$ nvcc -gencode arch=compute_60,code=sm_60 -o sample sample.cu -lcufft
If you need to call cufft in the usual C program, -I, -L and -l options are required in the compilation.
$ module load cuda
$ gcc -o blas blas.c -I${CUDA_HOME}/include -L${CUDA_HOME}/lib64 -lcufft
7.4. Machine learning, big data analysis software
7.4.1. CuDNN
You can load with the following commands:
$ module load cudacudnn
7.4.2. NCCL
You can load with the following commands:
$ module load cudanccl
7.4.3. Caffe
You can load and use interactively with the following commands:
$ module load intel cuda nccl cudnn caffe
For more details, please refer the following site:
http://caffe.berkeleyvision.org/
If you want to use MKL from caffe, you should add #define USE_MKL in the code which invokes caffe, to ensure libraries are loaded from $MKLROOT.
7.4.4. Chainer
You can load and use interactively with the following commands:
$ module load intel cuda nccl cudnn openmpi/2.1.2-opa10.9-t3 chainer
For more details, please refer the following site: https://docs.chainer.org/en/stable/
7.4.5. TensorFlow
You could run interactive use like in this example.
- python2.7
$ module load python-extension
$ cp -rp $PYTHON_EXTENSION_DIR/examples/tensorflow/examples .
$ cd examples/tutorials/mnist
$ python mnist_deep.py
- python3.9.2
$ module load python/3.9.2 cuda/11.2.146 cudnn/8.1 nccl/2.8.4 tensorflow
7.4.6. DeePMD-kit
DeePMD-kit is a machine learning framework for MD.
The followings are some exmples of the job script.
7.4.6.1. DeePMD-kit + LAMMPS
7.4.6.1.1. DeePMD-kit + LAMMPS 1 node
The following is an example job script of DeePMD-kit + LAMMPS(1 node, 4GPUs).
#!/bin/sh
#$ -l h_rt=6:00:00
#$ -l f_node=1
#$ -cwd

. /etc/profile.d/modules.sh
module purge
module load deepmd-kit/2.1.5 intel ffmpeg lammps/23jun2022_u2
module li 2>&1

# enable DeePMD-kit for lammps/23jun2022_u2
export LAMMPS_PLUGIN_PATH=$DEEPMD_KIT_DIR/lib/deepmd_lmp

# https://tutorials.deepmodeling.com/en/latest/Tutorials/DeePMD-kit/learnDoc/Handson-Tutorial%28v2.0.3%29.html

wget https://dp-public.oss-cn-beijing.aliyuncs.com/community/CH4.tar
tar xf CH4.tar

cd CH4/00.data
python3 <<EOF
import dpdata
import numpy as np
data = dpdata.LabeledSystem('OUTCAR', fmt = 'vasp/outcar')
print('# the data contains %d frames' % len(data))
# random choose 40 index for validation_data
index_validation = np.random.choice(200,size=40,replace=False)
# other indexes are training_data
index_training = list(set(range(200))-set(index_validation))
data_training = data.sub_system(index_training)
data_validation = data.sub_system(index_validation)
# all training data put into directory:"training_data"
data_training.to_deepmd_npy('training_data')
# all validation data put into directory:"validation_data"
data_validation.to_deepmd_npy('validation_data')
print('# the training data contains %d frames' % len(data_training))
print('# the validation data contains %d frames' % len(data_validation))
EOF

export PSM2_DEVICES="shm,self,hfi"

cd ../01.train
dp train input.json
dp freeze -o graph.pb
dp compress -i graph.pb -o graph-compress.pb
dp test -m graph-compress.pb -s ../00.data/validation_data -n 40 -d results

cd ../02.lmp
ln -s ../01.train/graph-compress.pb
lmp -i in.lammps
7.4.6.1.2. DeePMD-kit + LAMMPS 2 nodes
The following is an example job script of DeePMD-kit + LAMMPS(2 nodes, 8GPUs).
#!/bin/sh
#$ -l h_rt=12:00:00
#$ -l f_node=2
#$ -cwd

. /etc/profile.d/modules.sh
module purge
module load deepmd-kit/2.1.5 intel ffmpeg lammps/23jun2022_u2
module li 2>&1

# enable DeePMD-kit
export LAMMPS_PLUGIN_PATH=$DEEPMD_KIT_DIR/lib/deepmd_lmp

# https://tutorials.deepmodeling.com/en/latest/Tutorials/DeePMD-kit/learnDoc/Handson-Tutorial%28v2.0.3%29.html

wget https://dp-public.oss-cn-beijing.aliyuncs.com/community/CH4.tar
tar xf CH4.tar

cd CH4/00.data
python3 <<EOF
import dpdata
import numpy as np
data = dpdata.LabeledSystem('OUTCAR', fmt = 'vasp/outcar')
print('# the data contains %d frames' % len(data))
# random choose 40 index for validation_data
index_validation = np.random.choice(200,size=40,replace=False)
# other indexes are training_data
index_training = list(set(range(200))-set(index_validation))
data_training = data.sub_system(index_training)
data_validation = data.sub_system(index_validation)
# all training data put into directory:"training_data"
data_training.to_deepmd_npy('training_data')
# all validation data put into directory:"validation_data"
data_validation.to_deepmd_npy('validation_data')
print('# the training data contains %d frames' % len(data_training))
print('# the validation data contains %d frames' % len(data_validation))
EOF

export PSM2_DEVICES="shm,self,hfi"

cd ../01.train
mpirun -x PATH -x LD_LIBRARY_PATH -x PYTHONPATH -x PSM2_CUDA=1 -x NCCL_BUFFSIZE=1048576 -npernode 4 -np 8 dp train i\
nput.json
dp freeze -o graph.pb
dp compress -i graph.pb -o graph-compress.pb
dp test -m graph-compress.pb -s ../00.data/validation_data -n 40 -d results

cd ../02.lmp
ln -s ../01.train/graph-compress.pb
mpirun -x PATH -x LD_LIBRARY_PATH -x PYTHONPATH  -x LAMMPS_PLUGIN_PATH -x PSM2_CUDA=1 -npernode 4 -np 8 lmp -i in.la\
mmps
7.4.6.2. DeePMD-kit + GROMACS
The following is an example job script of DeePMD-kit + LAMMPS(1 node, 4GPUs).
#!/bin/sh
#$ -l h_rt=8:00:00
#$ -l f_node=1
#$ -cwd

. /etc/profile.d/modules.sh
module purge
module load deepmd-kit/2.1.5 gromacs-deepmd/2020.2
module li 2>&1

export PSM2_DEVICES="shm,self,hfi"

cp -pr $DEEPMD_KIT_DIR/examples/examples/water .
cd water/se_e2_a

dp train input.json
dp freeze -o graph.pb
dp compress -i graph.pb -o graph-compress.pb
dp test -m graph-compress.pb -s ../data/data_3 -n 40 -d results

cd ../gmx
ln -s ../se_e2_a/graph-compress.pb frozen_model.pb
export GMX_DEEPMD_INPUT_JSON=input.json
gmx_mpi grompp -f md.mdp -c water.gro -p water.top -o md.tpr -maxwarn 3
gmx_mpi mdrun -deffnm md
gmx_mpi rdf -f md.trr -s md.tpr -o md_rdf.xvg -ref "name OW" -sel "name OW"
For more details, please refer to the following site:
https://docs.deepmodeling.com/projects/deepmd/en/master/index.html
7.4.7. R
Rmpi for parallel processing and rpud for GPU are installed.
You could run interactive use like in this example.
$ module load intel cudaopenmpi r
$ mpirun -stdin all -np 2 R --slave --vanilla < test.R
7.4.8. clang
clang is C/C++ compiler whose backend is LLVM.
The following is an exmple to use clang with GPU offloading.
-
for C
$ module load cuda clang $ clang -fopenmp -fopenmp-targets=nvptx64-nvidia-cuda --cuda-path=$CUDA_HOME -Xopenmp-target -march=sm_60 test.c -
for C++
$ module load cuda clang
$ clang++ -stdlib=libc++ -fopenmp -fopenmp-targets=nvptx64-nvidia-cuda --cuda-path=$CUDA_HOME -Xopenmp-target -march=sm_60 test.cxx -lc++abi
For more details, please refer to the following site:
https://clang.llvm.org/
7.4.9. Apache Hadoop
You could run interactive use like in this example.
$ module load jdk hadoop
$ mkdir input
$ cp -p $HADOOP_HOME/etc/hadoop/*.xml input
$ hadoop jar $HADOOP_HOME/share/hadoop/mapreduce/hadoop-mapreduce-examples-2.8.0.jar grep input output 'dfs[a-z.]+'
$  cat output/part-r-00000
1       dfsadmin
You could submit a batch job. The following is a sample job script.
#!/bin/bash
#$ -cwd
#$ -l f_node=1
#$ -l h_rt=0:10:0
#$ -N hadoop

. /etc/profile.d/modules.sh
module load jdk hadoop

cd $TMPDIR
mkdir input
cp -p $HADOOP_HOME/etc/hadoop/*.xml input
hadoop jar $HADOOP_HOME/share/hadoop/mapreduce/hadoop-mapreduce-examples-2.8.0.jar grep input output 'dfs[a-z.]+'
cp -rp output $HOME
7.5. Visualization software
7.5.1. POV-Ray
You can start with the following commands:
$ module load pov-ray
$ povray -benchmark
For more details, please refer the following site: http://www.povray.org/
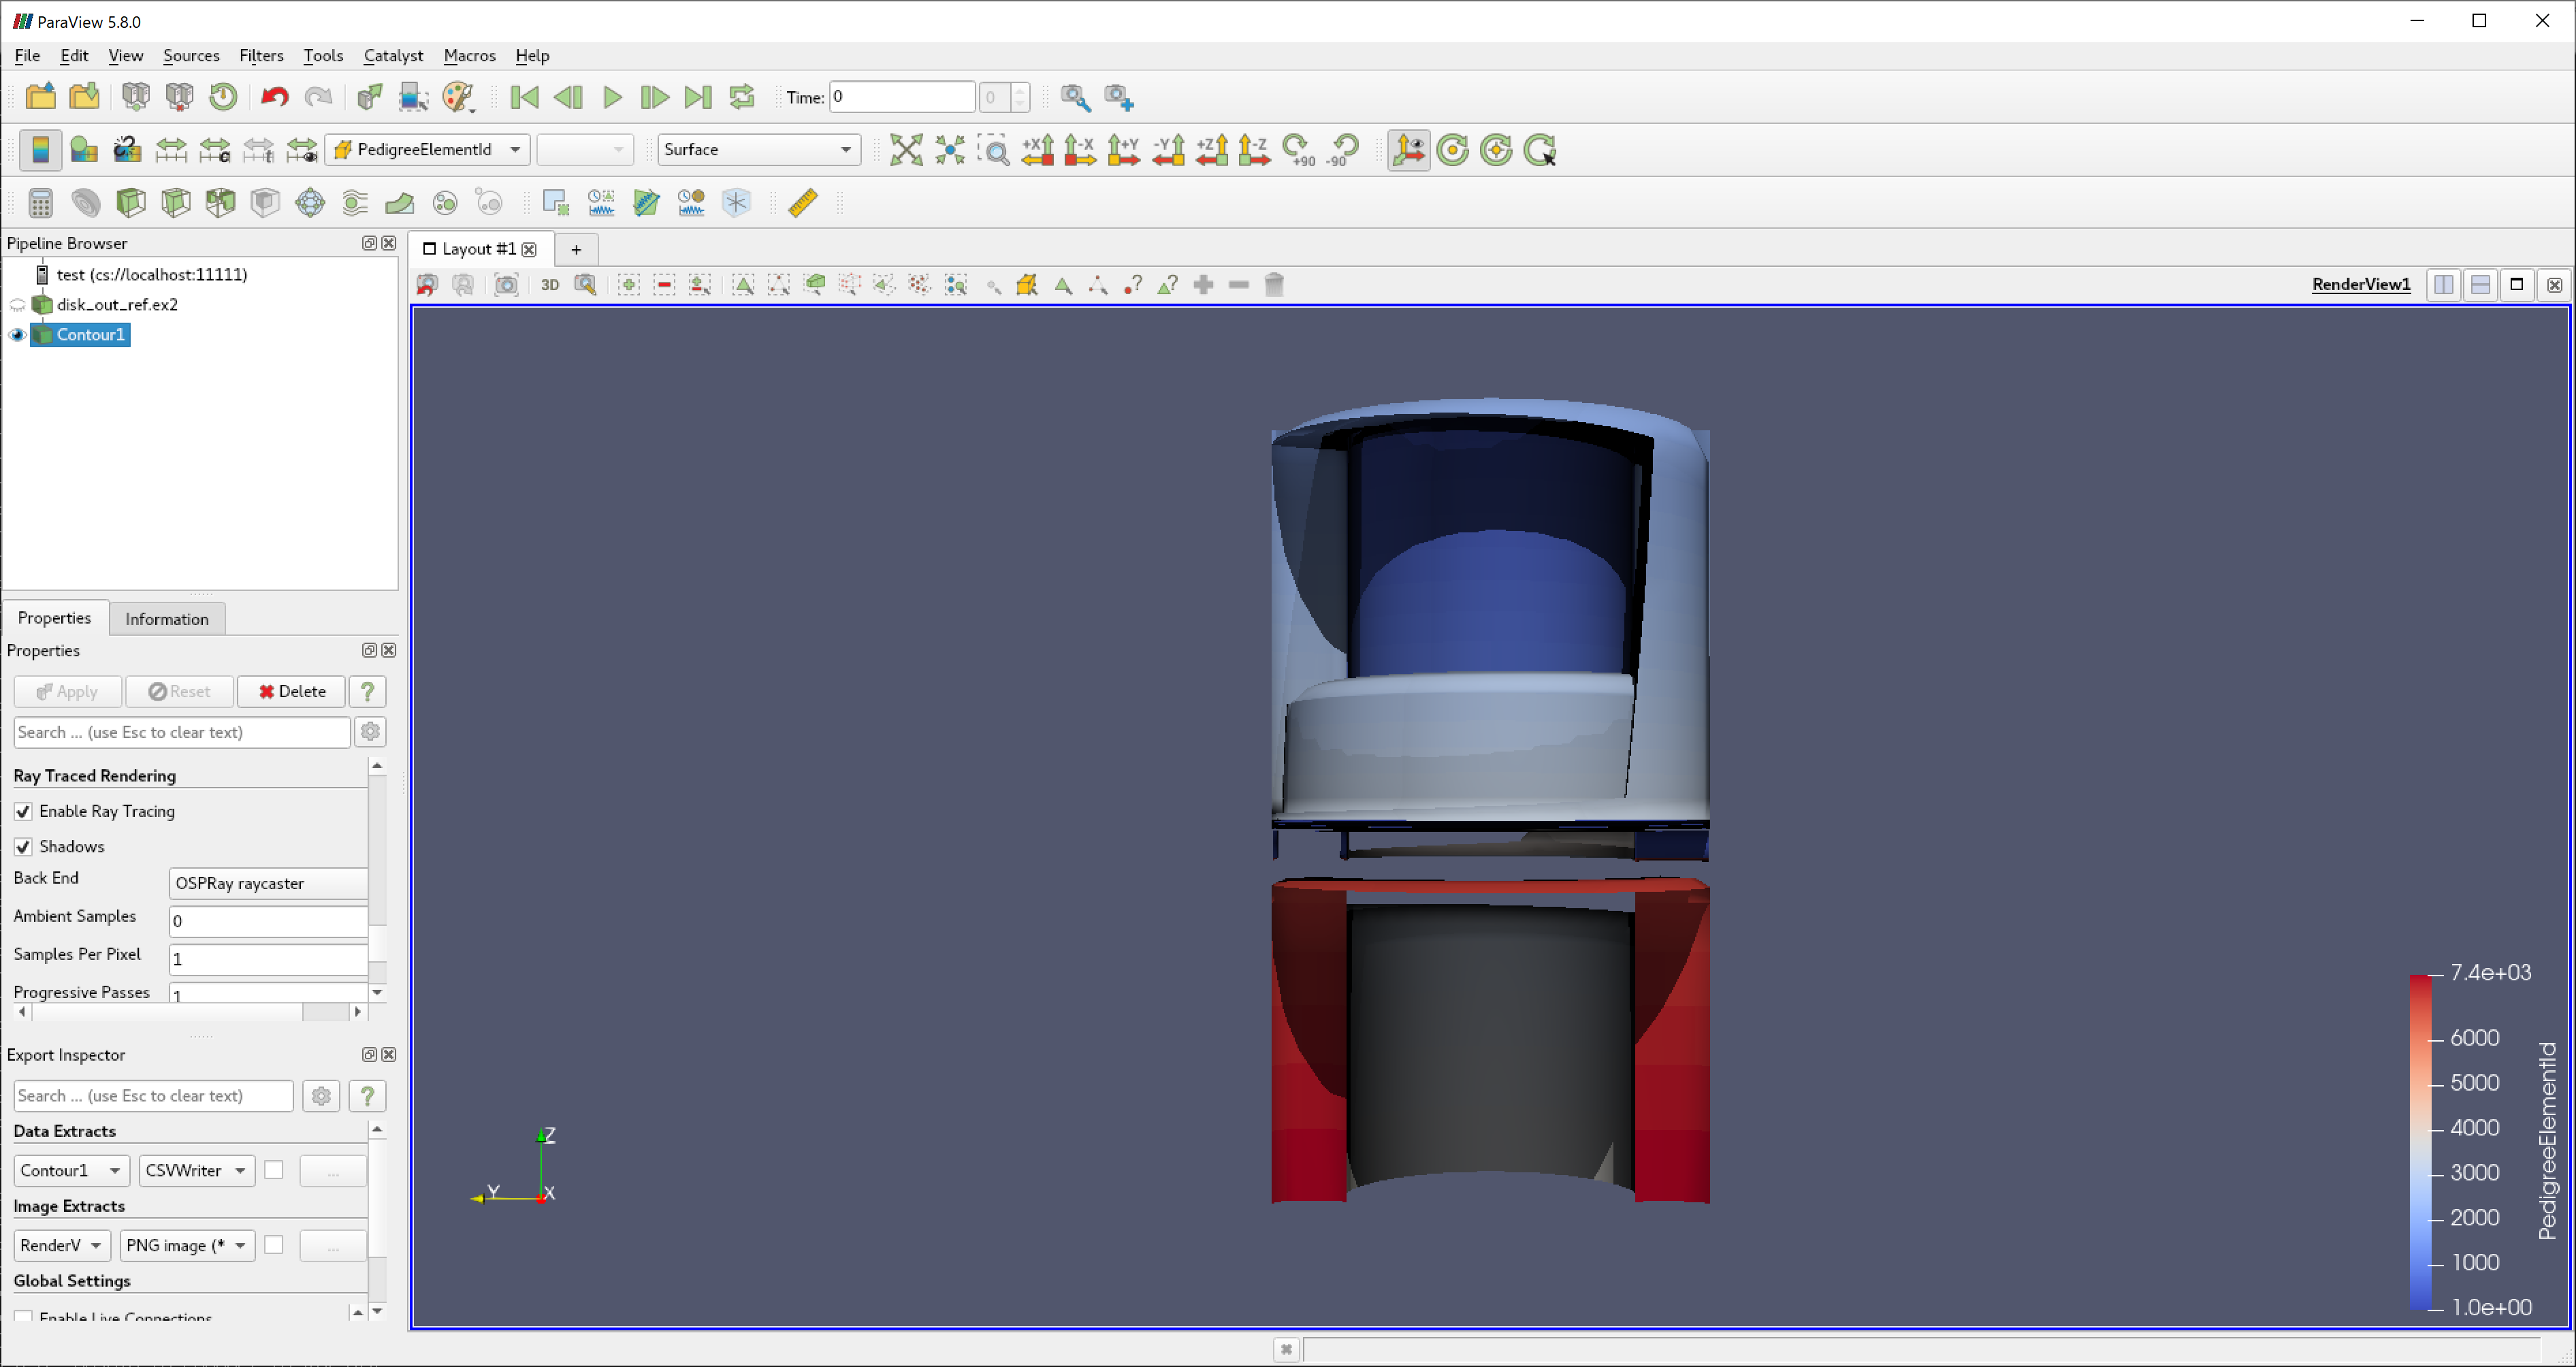
7.5.2. ParaView
You can start with the following commands:
$ module load cuda openmpi paraview
$ paraview
7.5.2.1. Vizualization with multiple GPUs
It is possible to vizualize by using multiple nodes/GPUs with paraview/5.10.0 and paraview/5.10.0-egl.
Please note that paraview/5.10.0-egl does not have paraview command, it only includes commandline executables.
The following is an exmple use of 8 GPUs with f_node=2.
- wrap.sh
#!/bin/sh

num_gpus_per_node=4
mod=$((OMPI_COMM_WORLD_RANK%num_gpus_per_node))

if [ $mod -eq 0 ];then
    export VTK_DEFAULT_EGL_DEVICE_INDEX=0
elif [ $mod -eq 1 ];then
    export VTK_DEFAULT_EGL_DEVICE_INDEX=1
elif [ $mod -eq 2 ];then
    export VTK_DEFAULT_EGL_DEVICE_INDEX=2
elif [ $mod -eq 3 ];then
    export VTK_DEFAULT_EGL_DEVICE_INDEX=3
fi

$*
- job.sh
#!/bin/sh
#$ -cwd
#$ -V
#$ -l h_rt=8:0:0
#$ -l f_node=2

. /etc/profile.d/modules.sh

module purge
module load cuda openmpi/3.1.4-opa10.10-t3 paraview/5.10.0-egl

mpirun -x PSM2_CUDA=1 -x PATH -x LD_LIBRARY_PATH -npernode 4 -np 8 ./wrap.sh pvserver
Note that if openmpi/3.1.4-opa10.10-t3 with PSM2_CUDA=1 is not used, visualization part is only excecued on GPU and computation part is not executed.
Please do not forget setting the execution permission to wrap.sh(chmod 755 wrap.sh).
With the above job script, submit the job.
qsub -g <group name> job.sh
Then, check if the job is running by qstat.
yyyyyyyy@login0:~> qstat
job-ID     prior   name       user         state submit/start at     queue                          jclass                         slots ja-task-ID
------------------------------------------------------------------------------------------------------------------------------------------------
   xxxxxxx 0.55354 job.sh     yyyyyyyy     r     05/31/2020 09:24:19 all.q@rXiYnZ                                                     56
Login to the allocated node by ssh command with X forwarding.
yyyyyyyy@login0:~> ssh -CY rXiYnZ
yyyyyyyy@rXiYnZ:~> module load cuda openmpi paraview/5.10.0
paraview
turbovnc is also possible to use.
After starting paraview, click "File"->"Connect", then click "Add Server".
Input "Name" field appropriately("test" as an example), click "Configure".
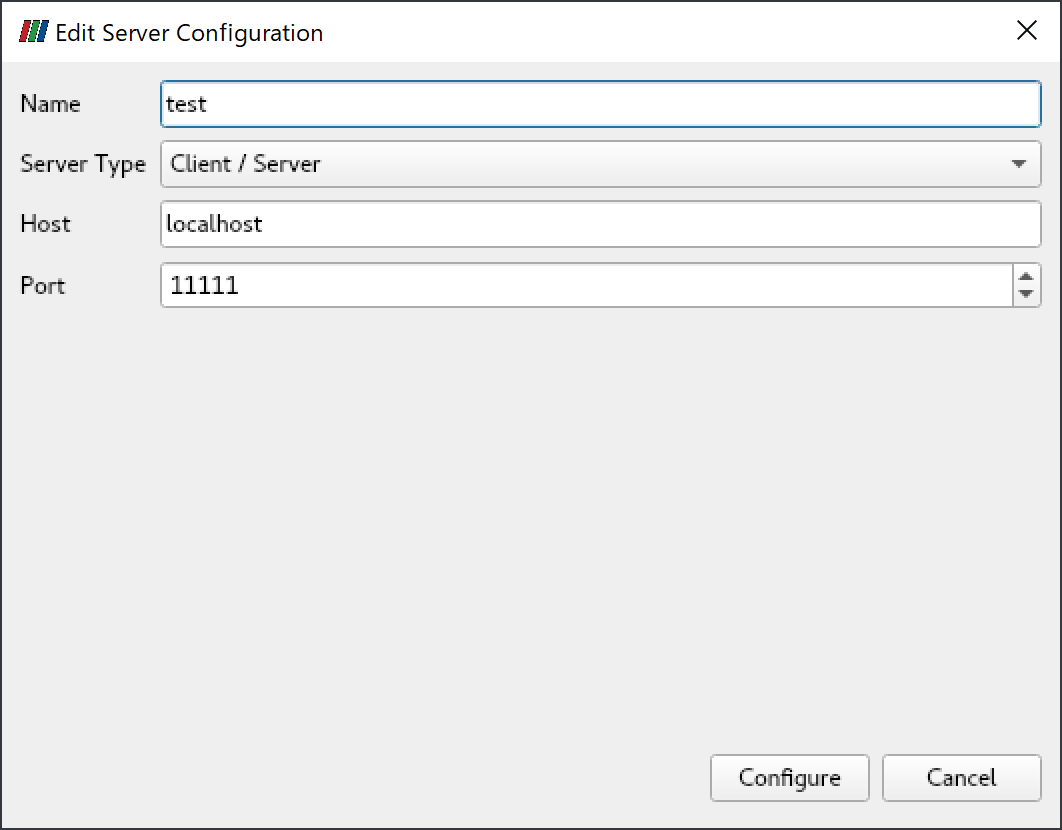
Click "Connect".
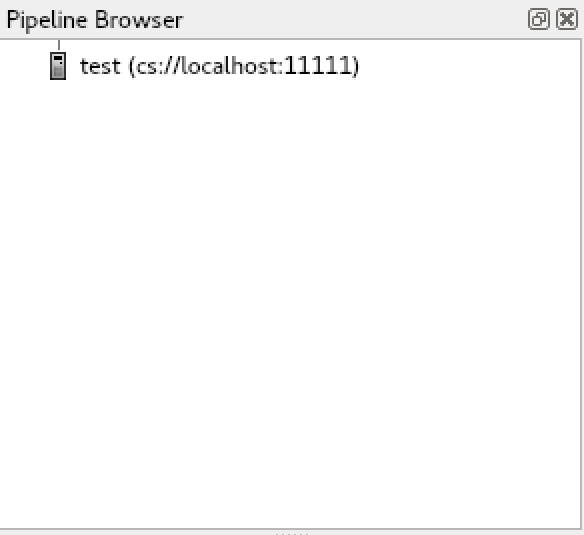
When the connection is established, test(cs://localhost:11111) is displayed in "Pipeline Browser".
paraview examples data can be downloaded from here.
For more details, please refer the following site: https://www.paraview.org/
7.5.3. VisIt
You can start with the following commands:
$ module load cuda openmpi vtk visit
$ visit
7.6. Other freeware
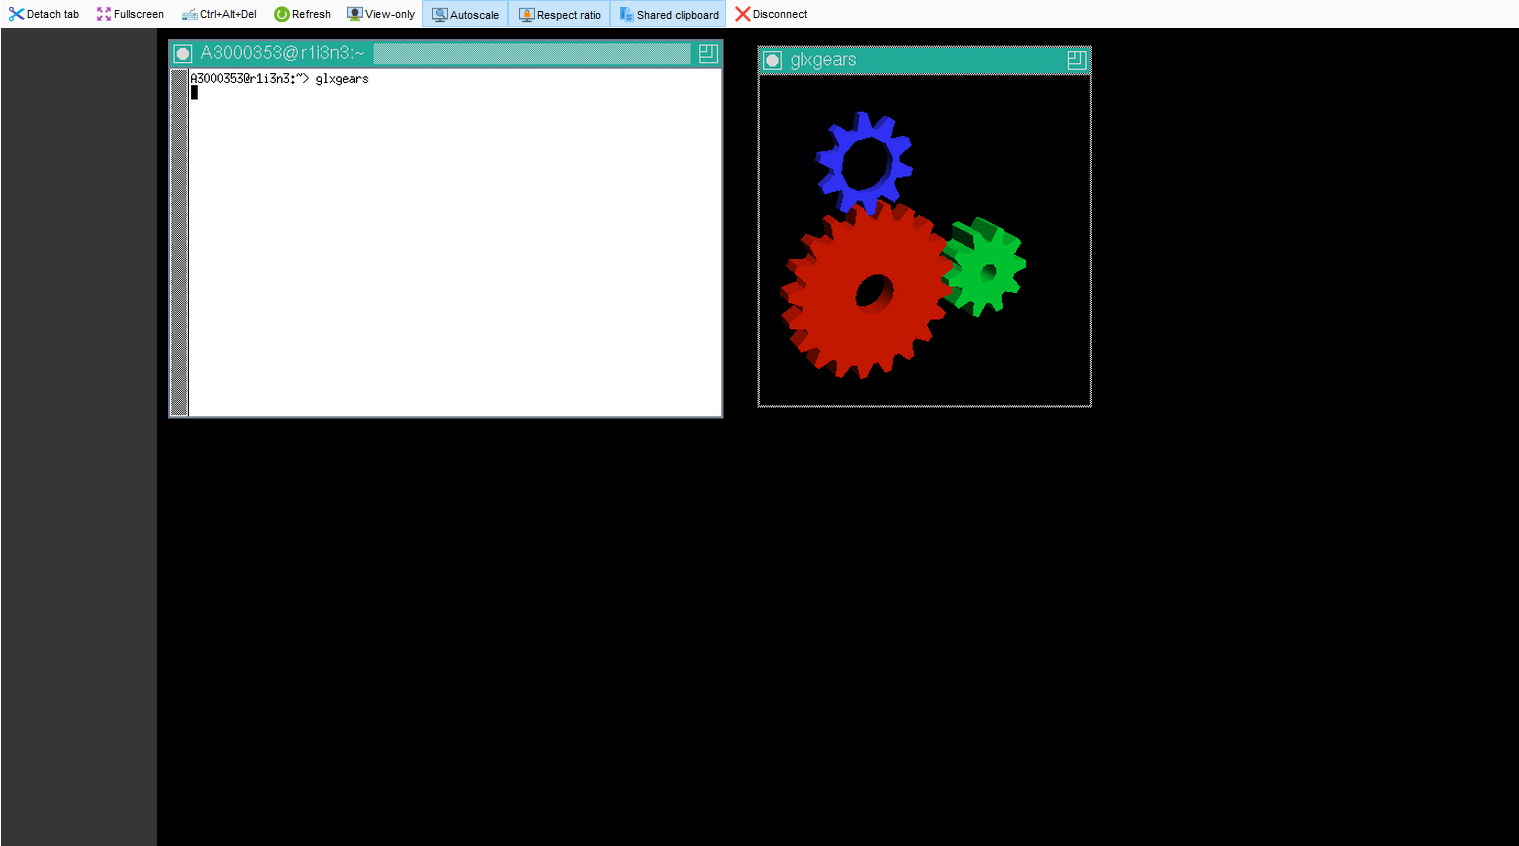
7.6.1. turbovnc
turobvnc is an open source VNC software.
The following is an example to use turbovnc.
Please try them on the compute node by qrsh.
- allocate a compute node
$ qrsh -g <group name> -l <resource type>=<count> -l h_rt=<time>
- start vncserver on the node
$ module load turbovnc
$ vncserver

You will require a password to access your desktops.

Password:  # <-- set the password
Verify:
Would you like to enter a view-only password (y/n)? n

Desktop 'TurboVNC: rXiYnZ:1 ()' started on display rXiYnZ:1 # <-- remember the VNC display number ":1"

Creating default startup script /home/n/xxxx/.vnc/xstartup.turbovnc
Starting applications specified in /home/n/xxxx/.vnc/xstartup.turbovnc
Log file is /home/n/xxxx/.vnc/rXiYnZ:1.log
If you want to enlarge the VNC screen size, do vncserver -geometry <WIDTH>x<HEIGHT> and set the size.
- Download the installer from https://sourceforge.net/projects/turbovnc/files/ and install turbovnc viewer into your local PC
- From the terminal software you are connecting to TSUBAME, setup port forwarding as local port 5901 to the compute node port 5901.(if the display number is rXiYnZ:n, set the port number 5900+n)
- Start vncviewer from your PC, connect to localhost:5901 and input the password you set.
7.6.1.1. use VNC client from MobaXterm
MobaXterm includes VNC client, therefore installing VNC client is not necessary.
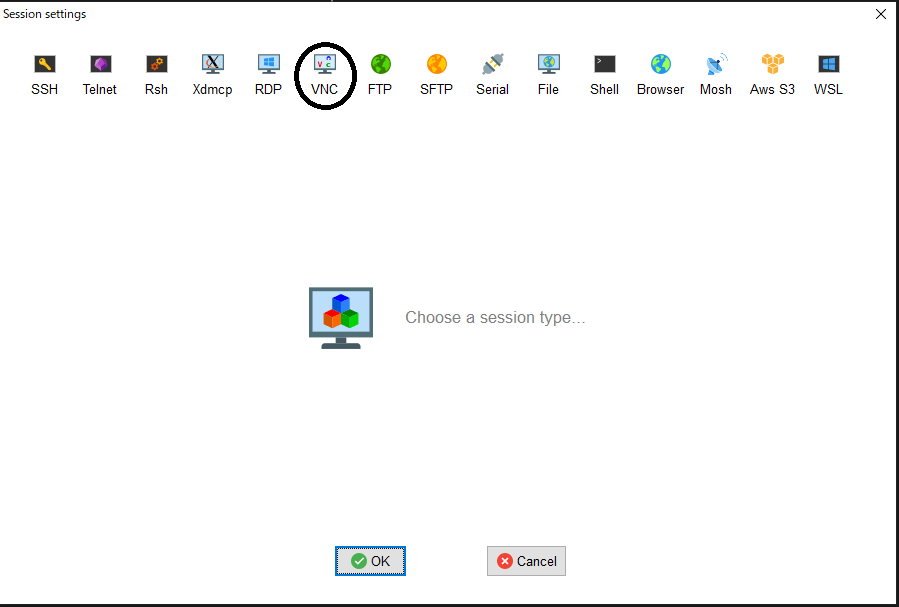
- From MobaXterm, choose 「Sessions」->「New session」->「VNC」.
- Type the hostname of the allocated node into 「Remote hostname or IP address」 on 「Basic Vnc settings」, input 5900+n into 「Port」, click 「Connect through SSH gateway(jump host)」 in 「Network settings」 then type login.t3.gsic.titech.ac.jp into「Gateway SSH server」, 「Port」 is 22, type your login name in TSUBAME into 「User」, check「Use private key」 and input the path of your private key.
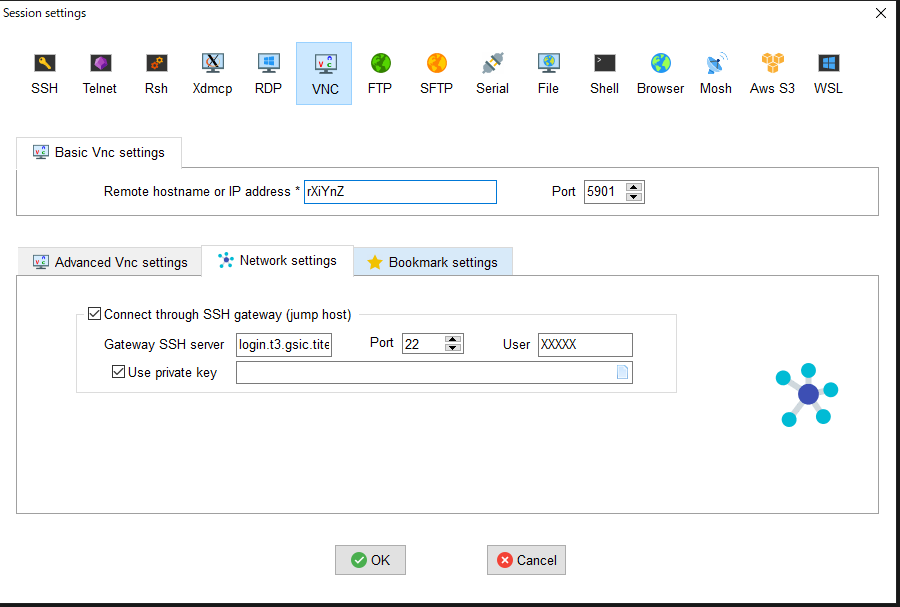
- Click 「OK」 then VNC client will be started.
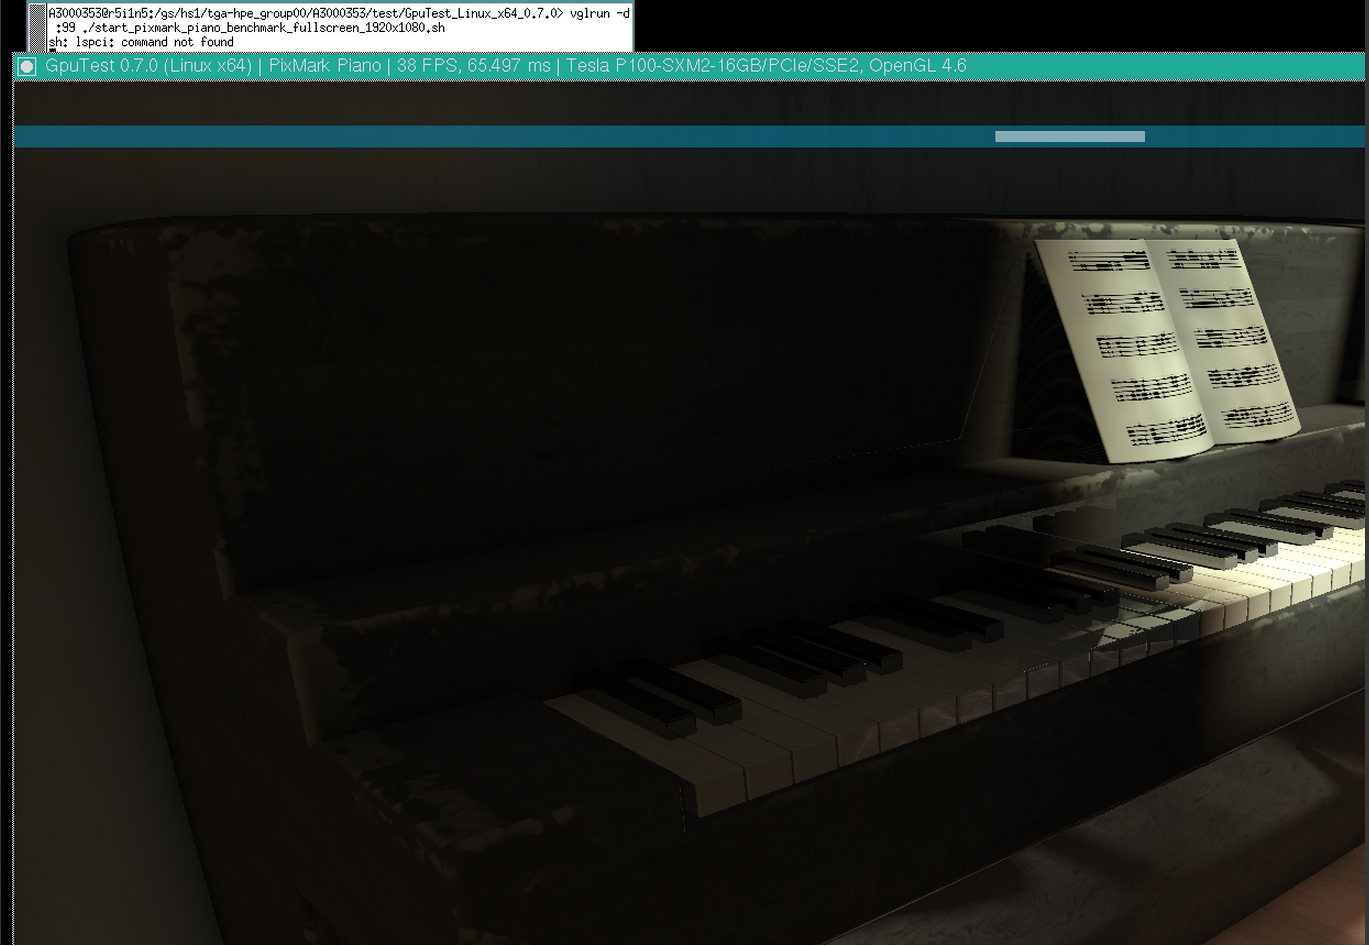
7.6.1.2. turbovnc + VirtualGL
For resource types (s_gpu, q_node, h_node, f_node) that uses one or more GPUs when turbovnc is used, it is possible to visualize using the GPU by VirtualGL.
Some applications fail to draw with X forwarding or normal VNC session(e.g. GpuTest, and UNIGINE), please try VirtualGL with such applications.
For example, the following is an exmpale to use VirtualGL with s_gpu.
$ qrsh ... -l s_gpu=1
$ . /etc/profile.d/modules.sh
$ module load turbovnc
$ Xorg -config xorg_vgl.conf :99 & # where :99 is aribitrary display number for VirtualGL
$ vncserver
Warning
Please note that the display number for VirtualGL is different from the one of VNC.
If anohter user is using the display number, the following error occurs when executing Xorg.
user@r7i7n7:~> Xorg -config xorg_vgl.conf :99 &
user@r7i7n7:~> (EE)
Fatal server error:
(EE) Server is already active for display 99
        If this server is no longer running, remove /tmp/.X99-lock
        and start again.
(EE)
(EE)
Please consult the The X.Org Foundation support
         at http://wiki.x.org
 for help.
(EE)
In this case, set :99 to :100 to assign a display number that is not used by other users.
- connect VNC client and do the following
$ vglrun -d :99 <OpenGL application> # where :99 is the display number for VirtualGL that is set by Xorg above
If you allocated multiple GPUs and want to use second or subsequent GPUs, add the screen number to the display number.
$ vglrun -d :99.1 <OpenGL application> # where :99 is the display number for VirtualGL that is set by Xorg above, .1 is the screen number
In the above example, the third GPU is used if screen number .2 is set, and the forth GPU is used if screen number .3 is set.
- An example use of VirtualGL with GpuTest
vglrun -d :99 ./start_pixmark_piano_benchmark_fullscreen_1920x1080.sh
7.6.2. gnuplot
In addition to the standard configure option, it is built to correspond to X11, latex, PDFlib-lite, Qt4.
You can start with the following commands:
$ module load gnuplot
$ gnuplot
7.6.3. Tgif
You can start with the following commands:
$ module load tgif
$ tgif
(note) Cannot open the Default (Msg) Font '--courier-medium-r-normal--14-----*-iso8859-1'.
If the above error occurs and it does not start up, add the following line to ~ / .Xdefaults.
Tgif.DefFixedWidthFont:             -*-fixed-medium-r-semicondensed--13-*-*-*-*-*-*-*
Tgif.DefFixedWidthRulerFont:        -*-fixed-medium-r-semicondensed--13-*-*-*-*-*-*-*
Tgif.MenuFont:                    -*-fixed-medium-r-semicondensed--13-*-*-*-*-*-*-*
Tgif.BoldMsgFont:                 -*-fixed-medium-r-semicondensed--13-*-*-*-*-*-*-*
Tgif.MsgFont:                     -*-fixed-medium-r-semicondensed--13-*-*-*-*-*-*-*
7.6.4. GIMP
You can start with the following commands:
$ module load gimp
$ gimp
7.6.5. ImageMagick
In addition to standard configure options, it is built to correspond to X11, HDRI, libwmf, jpeg. You can start with the following commands:
$ module load imagemagick
$ convert -size 48x1024 -colorspace RGB 'gradient:#000000-#ffffff' -rotate 90 -gamma 0.5 -gamma 2.0 result.jpg
7.6.6. pLaTeX2e
You can start with the following commands:
$ module load texlive
$ platex test.tex
$ dvipdfmx test.dvi
(note) Please use dvipdfmx to create pdf. Dvipdf does not convert Japanese properly.
7.6.7. Java SDK
You can start with the following commands:
$ module load jdk
$ javac Test.java
$ java Test
7.6.8. PETSc
Two different installations are provided: supporting real numbers and complex numbers. You can start with the following commands:
$ module load intel intel-mpi
$ module load petsc/3.7.6/real           <-- real number
 OR
$ module load petsc/3.7.6/complex       <-- complex number
$ mpiifort test.F -lpetsc
7.6.9. FFTW
Different versions are installed: 2.x series and 3.x series. You can start with the following commands:
$ module load intel intel-mpi fftw         <-- in case, Intel MPI
OR
$ module load intel cuda openmpi fftw     <-- in case, Open MPI
$ ifort test.f90 -lfftw3
7.6.10. DMTCP
An example using DMTCP is as follows.
- Create the checkpoint
#!/bin/sh
# Descriptions about other options is omitted
#$ -ckpt user
#$ -c sx
module load dmtcp
export DMTCP_CHECKPOINT_DIR=<store directory>
export DMTCP_COORD_HOST=`hostname`
export DMTCP_CHECKPOINT_INTERVAL=<time>
dmtcp_coordinator --quiet --exit-on-last --daemon 2>&1        # start DMTCP
# Test if the first start or restarted
dmtcp_launch ./a.out                                # execute program by using DMTCP
$DMTCP_CHECKPOINT_DIR/dmtcp_restart_script.sh       # restart
- Restart from the checkpoint
#!/bin/sh
# Descriptions about other options is omitted
#$ -ckpt user
#$ -c sx
module load dmtcp
export DMTCP_CHECKPOINT_DIR=<store directory>
export DMTCP_COORD_HOST=`hostname`
export DMTCP_CHECKPOINT_INTERVAL=<time>
$DMTCP_CHECKPOINT_DIR/dmtcp_restart_script.sh       # restart
Refer to the site shown below. http://dmtcp.sourceforge.net/
7.6.11. Singularity
please try them with a qrsh session.
- Start a shell session
$ module load singularity
$ cp -p $SINGULARITY_DIR/image_samples/centos/centos7.6-opa10.9.sif .
$ singularity shell --nv -B /gs -B /apps -B /scr centos7.6-opa10.9.sif
- Execute a command in the container image
$ module load singularity
$ cp -p $SINGULARITY_DIR/image_samples/centos/centos7.6-opa10.9.sif .
$ singularity exec --nv -B /gs -B /apps -B /scr centos7.6-opa10.9.sif <command>
- Execute a MPI program
$ module load singularity cuda openmpi
$ cp -p $SINGULARITY_DIR/image_samples/centos/centos7.6-opa10.9.sif .
$ mpirun -x LD_LIBRARY_PATH -x SINGULARITYENV_LD_LIBRARY_PATH=$LD_LIBRARY_PATH -x SINGULARITYENV_PATH=$PATH -x <environment variables> -npernode <# of processes/node> -np <# of processes> singularity exec --nv -B /apps -B /gs -B /scr/ centos7.6-opa10.9.sif <MPI binary>
From singularity/3.4.2, fakeroot option is available to edit the image by user privilege.
Info
The fakeroot feature is introduced into Singularity 3.3.0. However, due to a system-specific problem, the function does not work on Singularity 3.4.1 or prior.
To edit the image by using fakeroot option, it is necessary to invoke them on $T3TMPDIR.
The following is an expample to install vim into centos image.
$ cd $T3TMPDIR
$ module load singularity
$ singularity build -s centos/ docker://centos:latest
INFO:    Starting build...
Getting image source signatures
...
$ singularity shell -f -w centos # -f is the fakeroot option
Singularity> id
uid=0(root) gid=0(root) groups=0(root)
Singularity> unset TMPDIR # a workaround for the error "Cannot create temporary file - mkstemp: No such file or directory"
Singularity> yum install -y vim
Failed to set locale, defaulting to C.UTF-8
CentOS-8 - AppStream                                                                  6.6 MB/s | 5.8 MB     00:00
CentOS-8 - Base                                                                       5.0 MB/s | 2.2 MB     00:00
CentOS-8 - Extras
...
Installed:
  gpm-libs-1.20.7-15.el8.x86_64            vim-common-2:8.0.1763-13.el8.x86_64  vim-enhanced-2:8.0.1763-13.el8.x86_64
  vim-filesystem-2:8.0.1763-13.el8.noarch  which-2.21-12.el8.x86_64

Complete!
Singularity> which vim
/usr/bin/vim
Singularity> exit
$ singularity build -f centos.sif centos/
INFO:    Starting build...
INFO:    Creating SIF file...
INFO:    Build complete: centos.sif
$ singularity shell centos.sif
Singularity> which vim
/usr/bin/vim # <--- vim has been installed
- Install CUDA OPA driver libraries into the container image(for installing OPA10.9.0.1.2 CUDA version into centos7.5 image)
note: OPA version of the system might be updated on the system maintenance, so please change the version of OPA if needed.
The version of OPA can be checked as follows.
$ rpm -qa |grep opaconfig
opaconfig-10.9.0.1-2.x86_64
Download the OPA installer from this link
$ module load singularity/3.4.2
$ cp -p IntelOPA-IFS.RHEL75-x86_64.10.9.0.1.2.tgz ~
$ singularity build -s centos7.5/ docker://centos:centos7.5.1804
$ find centos7.5/usr/ -mindepth 1 -maxdepth 1 -perm 555 -print0 |xargs -0 chmod 755 # some files in the image does not have writable permission, so add it
$ singularity shell -f -w centos7.5
Singularity centos:~> tar xf IntelOPA-IFS.RHEL75-x86_64.10.9.0.1.2.tgz
Singularity centos:~> cd IntelOPA-IFS.RHEL75-x86_64.10.9.0.1.2/IntelOPA-OFA_DELTA.RHEL75-x86_64.10.9.0.1.2/RPMS/redhat-ES75/CUDA/
Singularity centos:~> yum install -y numactl-libs hwloc-libs libfabric libibverbs infinipath-psm
Singularity centos:~> rpm --force -ivh libpsm2-*.rpm
Singularity centos:~> exit
$ find centos7.5/usr/bin -perm 000 -print0 |xargs -0 chmod 755 # after yum install, somehow permission 000 file is installed in /usr/bin, so change the permission
$ singularity build centos7.5.sif centos7.5/
Though IFS version is used in the previous example, BASIC version can be also used.
For more details, please visit the following page:
If you want to use apptainer, please do module load apptainer, and replease singularity with apptianer in the prevous commands.
7.6.12. Alphafold
Alphafold is a protein structure prediction program that uses machine learning.
The following is an example to use Alphafold.
-
initial setup(login nodes or compute nodes)
module purge module load cuda/11.0.3 alphafold/2.0.0 cp -pr $ALPHAFOLD_DIR . cd alphafold git pull # update to the latest version # if you want to use a specific version, please add the following.(in this case, the version is v2.0.1) # git checkout -b v2.0.1 v2.0.1 -
execution(an example of job script for alphafold/2.0.0)
#!/bin/sh #$ -l h_rt=24:00:00 #$ -l f_node=1 #$ -cwd . /etc/profile.d/modules.sh module purge module load cuda/11.0.3 alphafold/2.0.0 module li cd alphafold ./run_alphafold.sh -a 0,1,2,3 -d $ALPHAFOLD_DATA_DIR -o dummy_test/ -m model_1 -f ./example/query.fasta -t 2020-05-14 -
execution(an example of job script for alphafold/2.1.1)
#!/bin/sh
#$ -l h_rt=24:00:00
#$ -l f_node=1
#$ -cwd

. /etc/profile.d/modules.sh
module purge
module load cuda/11.0.3 alphafold/2.1.1
module li

cd alphafold
./run_alphafold.sh -a 0,1,2,3 -d $ALPHAFOLD_DATA_DIR -o dummy_test/ -f ./example/query.fasta -t 2020-05-14
For 2.2.0, please replace module load cuda/11.0.3 alphafold/2.1.1 with module load cuda/11.0.3 alphafold/2.2.0 in the example of alphafold/2.1.1.
Please note that due to the large size of the database files, please avoid downloading them individually if at all possible.
For more details of Alphafold, please refer to the following.
https://github.com/deepmind/alphafold